Impossible Box
Making the Impossible Possible
We are going to begin with a blank Codeblocks screen where we will be creating an Impossible Box. Your screen should look like the screen on the right.

Next, we will need a Box shape for the structure of the design. Drag a ‘Box’ coding Block into the Coding Space. Press the Play button to see the box in the Workplane. Now, click on the coloured circle to open a colour menu to change the colour of the box. Select a colour as shown below:
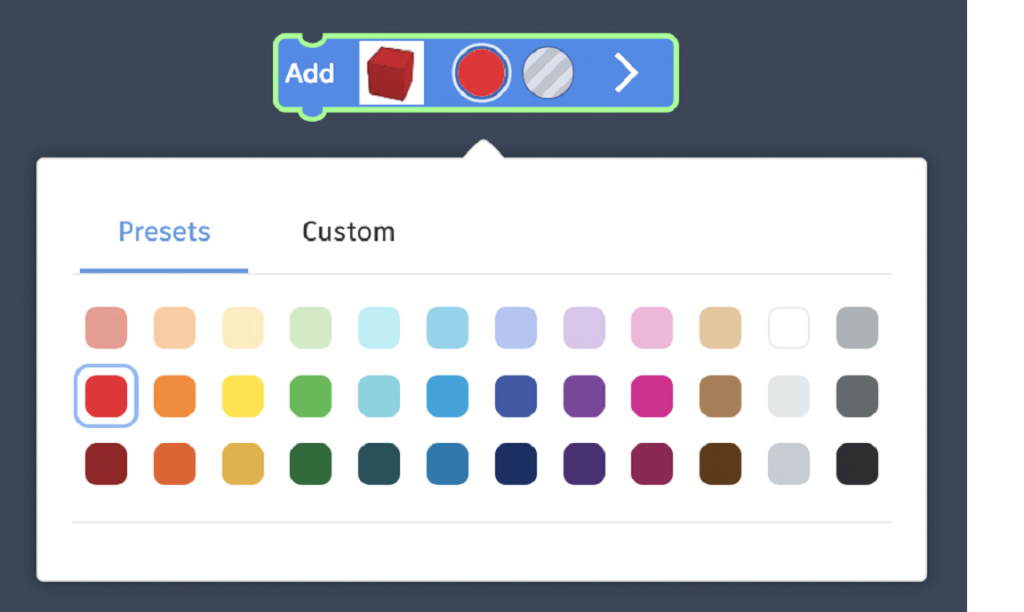
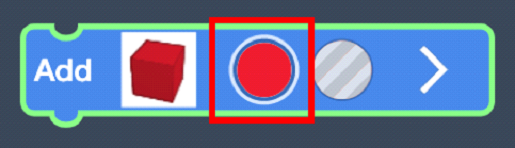
Once you select a colour it will close this menu and display on the Block.
Run the code again and the Box will have a different colour. In the Coding Space, expand the Block by clicking on the > button to view different properties of the shape as shown below:


Change the dimensions of the cube to W = 10, L = 10, and H = 10 as shown below. If you press the Play button again the box will be a different size.

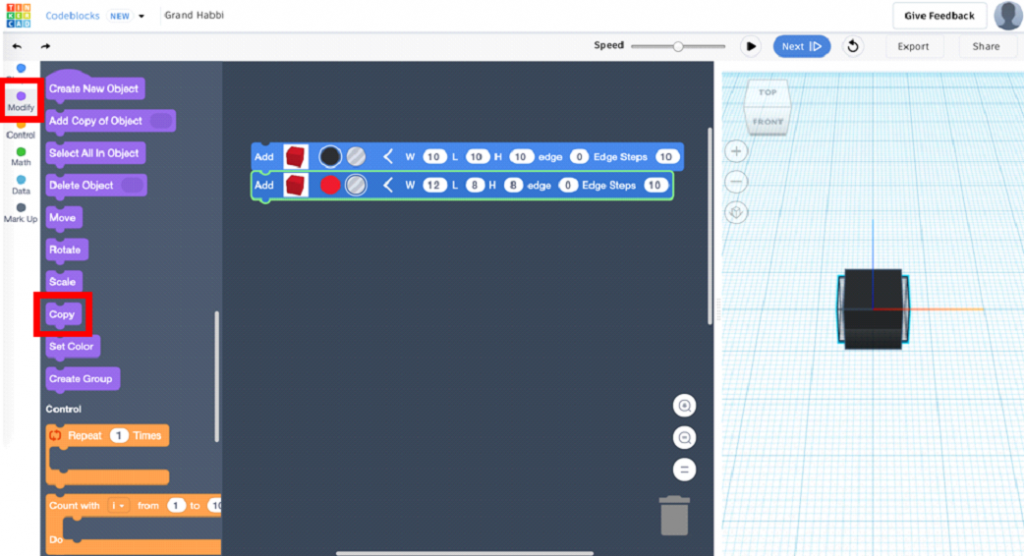
In order to create the Impossible Box, we need to make the inside of the Box visible. To do this we will add additional Box shapes to cut holes in each side of the cube. Drag another Box coding Block into the Coding Space and snap it to the code above, as shown below:

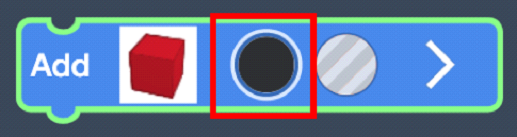
Next, select the No Colour option as shown below:

Expand the Block by clicking on the > button and change the dimensions of the Box to W = 12, L = 8, H = 8, as shown below:

If you Play the code again you will see a new rectangle sticking out of the black cube, as shown below.
We need to replicate this ‘hole’ on the other faces of the cube. If you go to the Modify tab on the left toolbar there will be a list of purple code Blocks. Drag the one that says Copy into the Coding Space and attach it to the rest of the code.
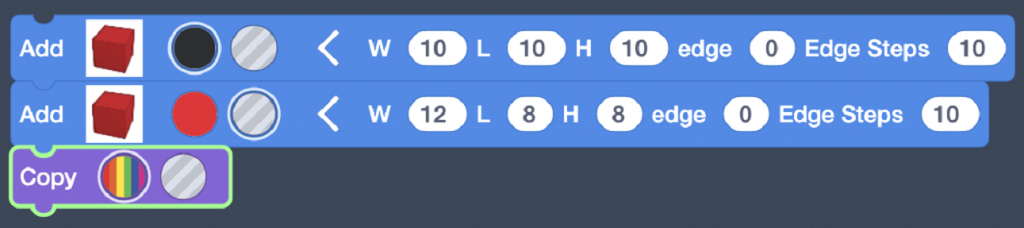
This will copy the code Block above it into the exact same position.
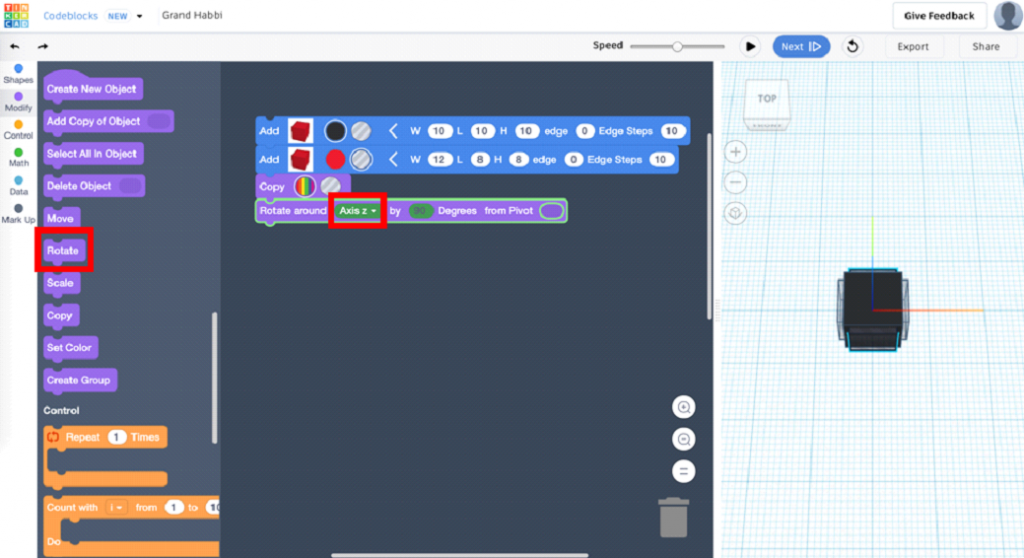
We need the new block to be rotated 90 degrees so it sticks out of the black Box on another face. Under the Modify menu, drag a Rotate code Block into the Coding Space. Change the axis the object will rotate around to the Axis z (blue axis). Press Play to run the code and you will see the new Box rotating to its new spot, as shown below.
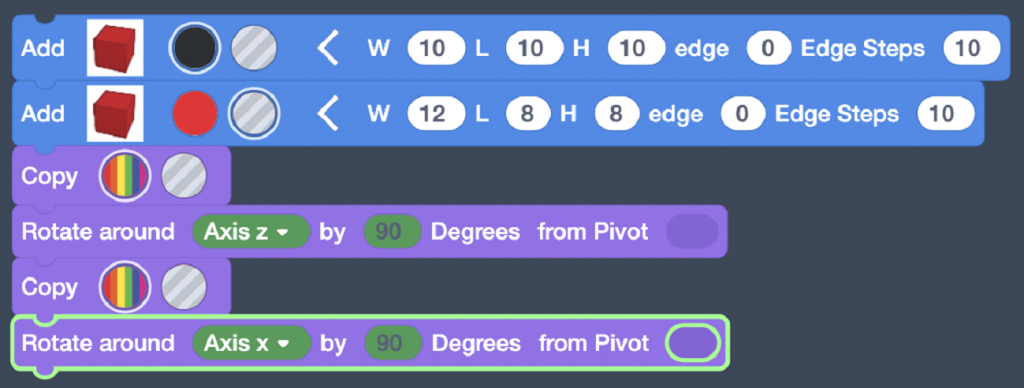
We need to do this one more time and have the Box stick through the top and bottom of the black box. Drag another Copy block as well as another Rotate block into the Coding Space, as shown below. We will set the block to rotate around Axis x (red axis).
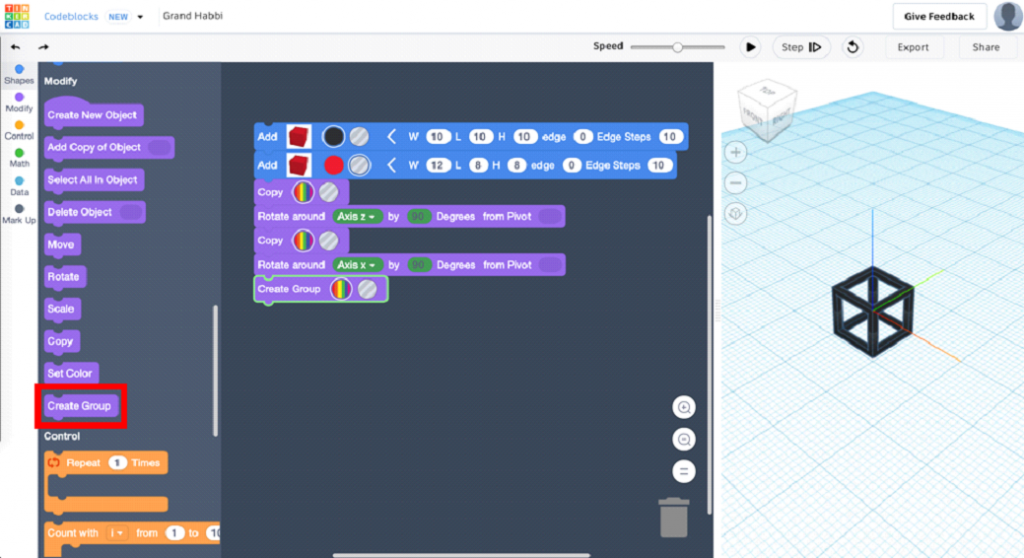
In order to actually cut the holes out of the object, the four boxes need to be in a group. In the Modify toolbar, drag the Create Group code Block into the Coding Space and run the code to see the design. You can rotate the Workplane to look around the design.
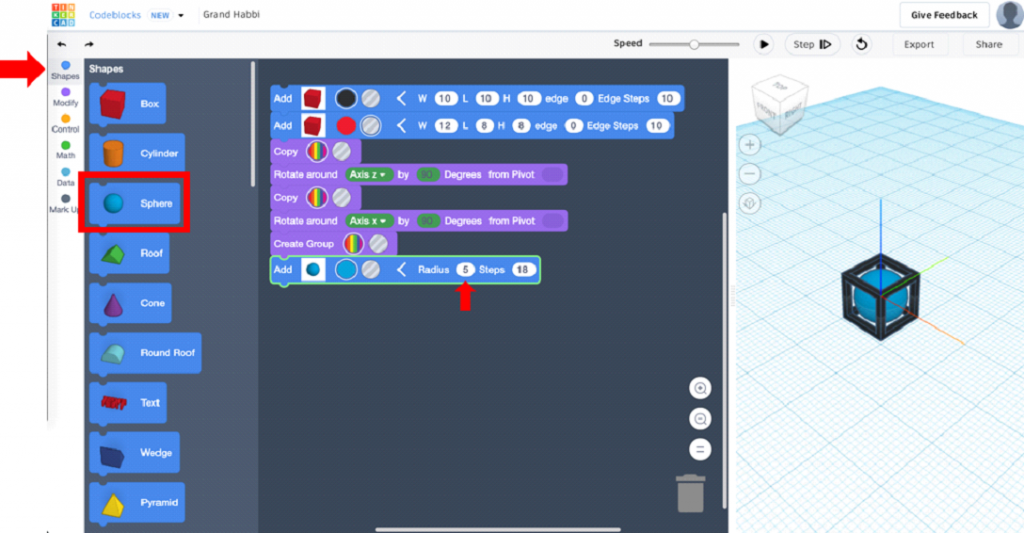
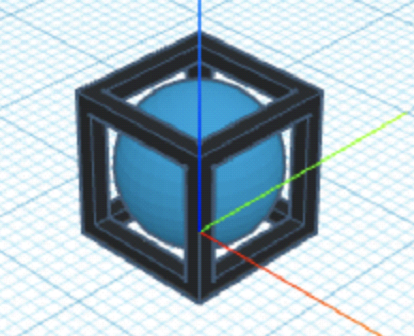
We want to finish this design by adding a Sphere in the middle of the cube. Go back to the Shapes menu from the toolbar on the left and drag a Sphere code Block into the Coding Space, as shown below.
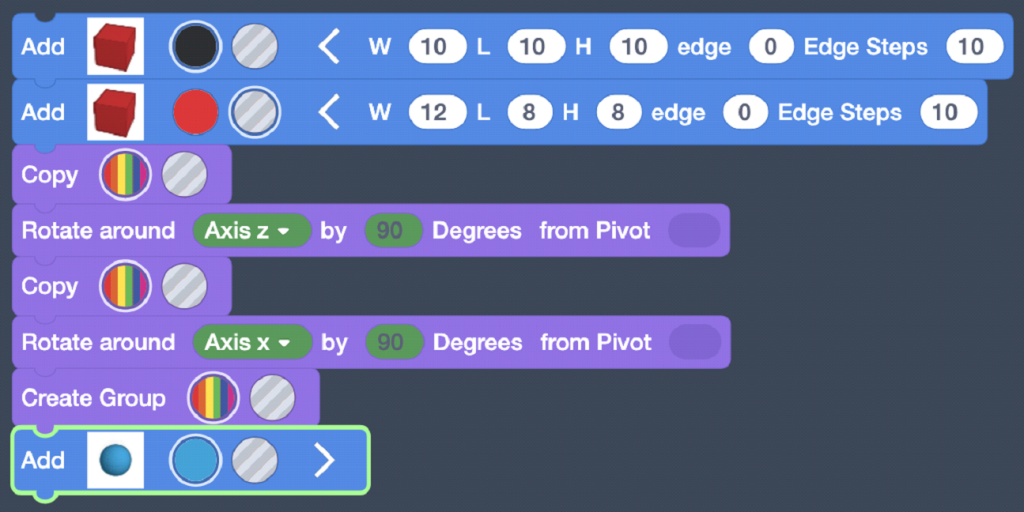
Expand the Sphere code Block by clicking on the > button and change the radius of the Sphere to 5, as shown below. Press Play to see the Sphere get ‘trapped’ inside the Box.
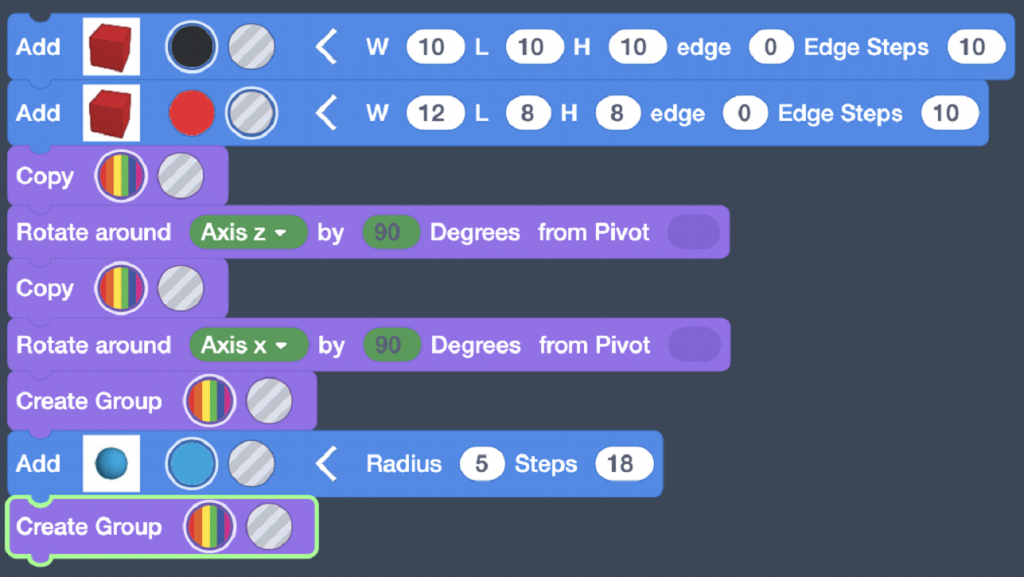
Go back to the Modify toolbar and drag another Create Group Block into the Coding Space. This will group all objects so they can be moved together.
In order to be able to complete a 3D print, the object must lay flat on the Workplane. In Codeblocks, each Shape that you add will insert on the origin in the middle of the object. Since the Box is 10x10x10, the entire object will need to move up 5 (half of the height of the Box). To do this, go to the Modify toolbar and drag a Move Block into the Coding Space. Change the value of Z to 5, as shown below.
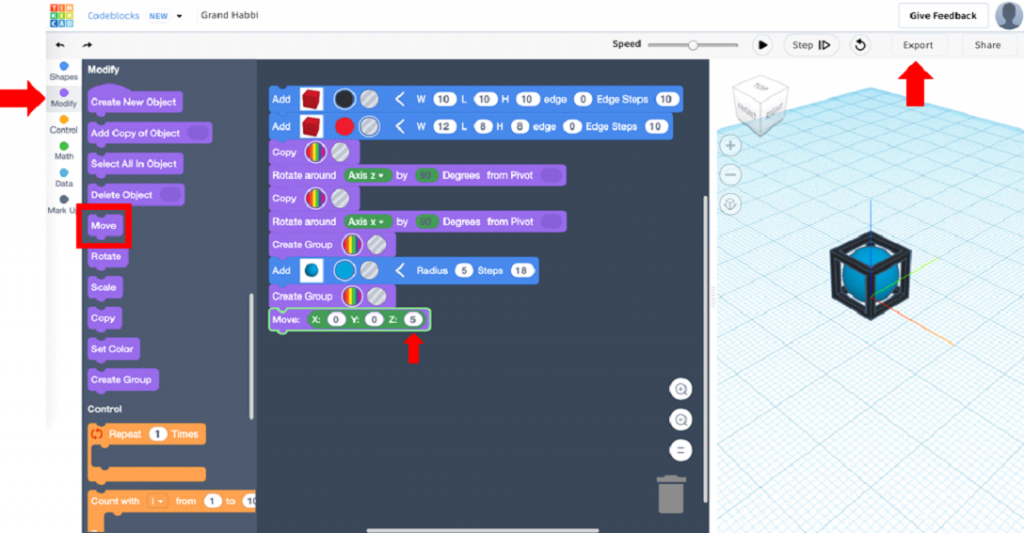
Press Play one last time to see your completed Impossible Box. The design can now be exported as a .STL file by clicking the Export button on the toolbar along the top.
Congratulations on making the impossible possible with coding!