Week 4: Physical Computing
Introduction:
Learn how to use the GPIO pins on your Raspberry Pi to interface with electronic components, such as LEDs and create Graphical user interface to control the electronic components.
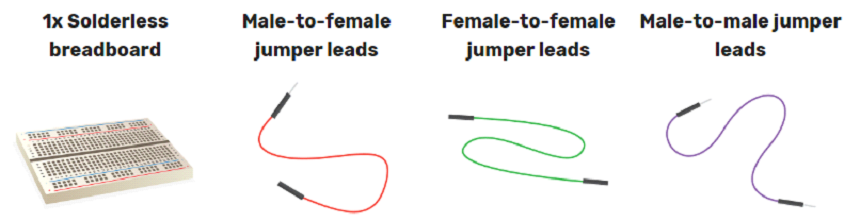
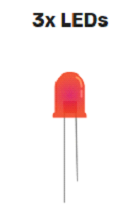
What you will need
GPIO pins
One powerful feature of the Raspberry Pi is the row of GPIO pins along the top edge of the board. GPIO stands for General-Purpose Input/Output. These pins are a physical interface between the Raspberry Pi and the outside world. At the simplest level, you can think of them as switches that you can turn on or off (input) or that the Pi can turn on or off (output).
The GPIO pins allow the Raspberry Pi to control and monitor the outside world by being connected to electronic circuits. The Pi is able to control LEDs, turning them on or off, run motors, and many other things. It’s also able to detect whether a switch has been pressed, the temperature, and light. We refer to this as physical computing.
Lighting an LED
LEDs are delicate little things. If you put too much current through them they will pop (sometimes quite spectacularly). To limit the current going through the LED, you should always use a resistor in series with it.
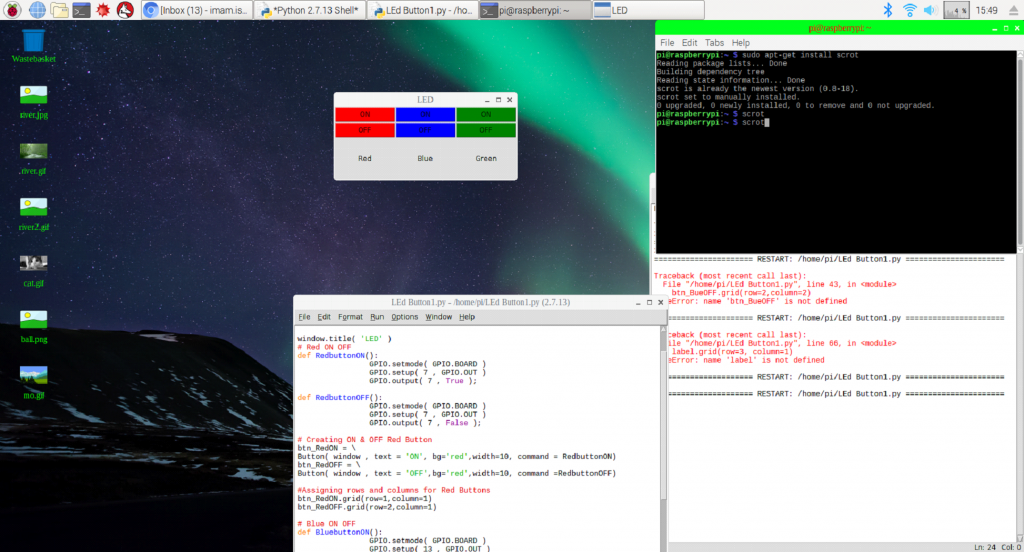
Creating Graphical User Interface:
Raspberry Pi ships with the standard Python module that you can use to create graphical applications.
Use the commands to create the GUI as shown below.
The GUI contains:
⦁ Window
⦁ Title
⦁ Labels (Red, Blue & Green)
⦁ Buttons to turn ON and turn OFF the LED connected to different pins of raspberry Pi.
(Hint: Use chapter 8 of Raspberry Pi 3 in easy steps to create the below GUI.)
Hardware connection.
Use a 330 ohm resistor to connect 3 LED’s to the raspberry pi. Connect LED’s to pin 7, 11 and 13 of the raspberry pi Board.
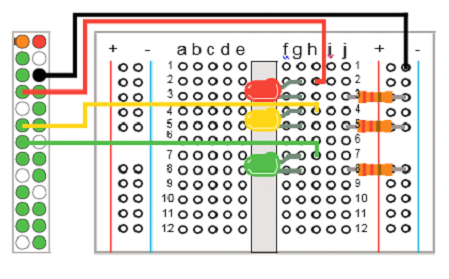
(Hint: Use chapter 9 of Raspberry Pi 3 in easy steps to create the below GUI.)
Program:
import RPi.GPIO as GPIO
from time import sleep
from Tkinter import*
window = Tk()
window.title( ‘LED’ )
Red ON OFF
def RedbuttonON():
GPIO.setmode( GPIO.BOARD )
GPIO.setup( 7 , GPIO.OUT )
GPIO.output( 7 , True );
def RedbuttonOFF():
GPIO.setmode( GPIO.BOARD )
GPIO.setup( 7 , GPIO.OUT )
GPIO.output( 7 , False );
Creating ON & OFF Red Button
btn_RedON = \
Button( window , text = ‘ON’, bg=’red’,width=10, command = RedbuttonON)
btn_RedOFF = \
Button( window , text = ‘OFF’,bg=’red’,width=10, command =RedbuttonOFF)
Assigning rows and columns for Red Buttons
btn_RedON.grid(row=1,column=1)
btn_RedOFF.grid(row=2,column=1)
Blue ON OFF
def BluebuttonON():
GPIO.setmode( GPIO.BOARD )
GPIO.setup( 13 , GPIO.OUT )
GPIO.output( 13 , True );
def BluebuttonOFF():
GPIO.setmode( GPIO.BOARD )
GPIO.setup( 13, GPIO.OUT )
GPIO.output( 13 , False );
Creating ON & OFF Blue Button
btn_BlueON = \
Button( window , text = ‘ON’,bg=’blue’,width=10, command = BluebuttonON)
btn_BlueOFF = \
Button( window , text = ‘OFF’,bg=’blue’,width=10, command =BluebuttonOFF)
Assigning rows and columns for Blue Buttons
btn_BlueON.grid(row=1,column=2)
btn_BlueOFF.grid(row=2,column=2)
Green ON OFF
def GreenbuttonON():
GPIO.setmode( GPIO.BOARD )
GPIO.setup( 11 , GPIO.OUT )
GPIO.output( 11 , True );
def GreenbuttonOFF():
GPIO.setmode( GPIO.BOARD )
GPIO.setup( 11, GPIO.OUT )
GPIO.output( 11 , False );
Creating ON & OFF Blue Button
btn_GreenON = \
Button( window , text = ‘ON’,bg=’green’,width=10, command = GreenbuttonON)
btn_GreenOFF = \
Button( window , text = ‘OFF’,bg=’green’,width=10, command = GreenbuttonOFF)
Assigning rows and columns for Green Buttons
btn_GreenON.grid(row=1,column=3)
btn_GreenOFF.grid(row=2,column=3)
Creating Labels
labelRed = Label( window ,width =12, height=5, text = ‘Red’ )
labelBlue = Label( window ,width =12, height=5, text = ‘Blue’ )
labelGreen = Label( window ,width =12, height=5, text = ‘Green’ )
Assigning rows and columns for labels
labelRed.grid(row=3, column=1)
labelBlue.grid(row=3, column=2)
labelGreen.grid(row=3, column=3)
GPIO.setwarnings(False);
window.mainloop()