Week 9: Raspberry Pi Twitterbot
Step 1: Install Twython Packages
To make Twitterbots that can send “live” tweets from the Raspberry Pi
Get the IP address of your Raspberry Pi
Open the Terminal window and on the command line, type:
ssh pi@10.0.1.62
If you are running directly hooked into the monitor, you can skip this step.
Run the latest package updates and upgrades, just to make sure everything is current — you will have to have wifi access for this step. Type in the commands:
sudo apt-get update
sudo apt-get upgrade
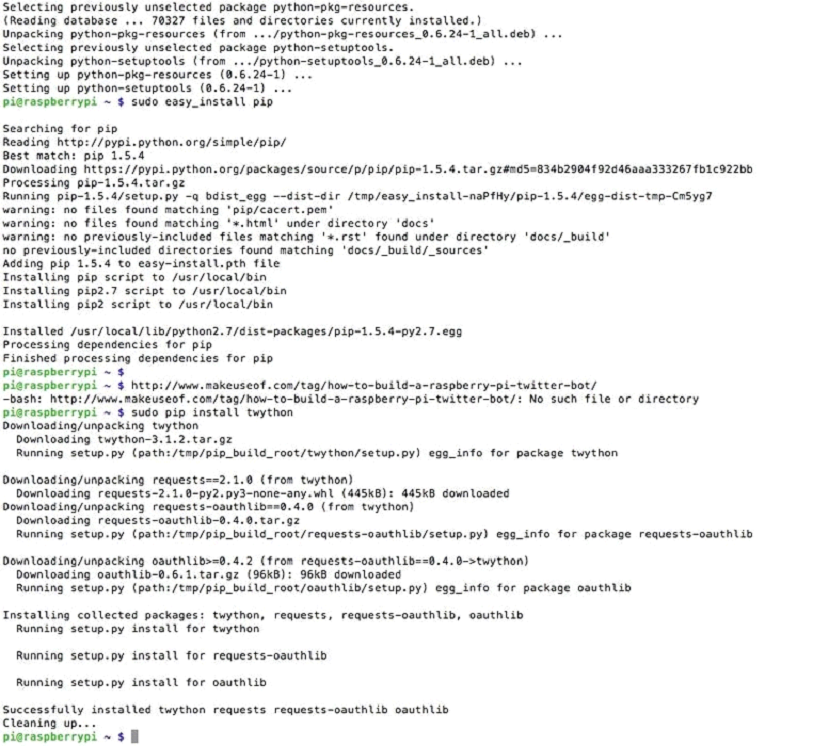
There will be a lot of waiting and Linux garble, so take break and pet your cat. Now, install the Twython libraries, which will let you use Twitter from Python using these three commands:
sudo apt-get install python-setuptools
sudo easy_install pip
sudo pip install twython
You’ll see more Linux stuff and then you should be good to go.
Step 2: Create Email for Account
Every Twitter account requires an email address, and your Twitterbot will need to have a unique one.
You can register for a free account with Yahoo, Gmail and many others.
I have by own ISP and about 10 Twitterbots, and so I create an email address for each one through my ISP. My Twitterbots also value their privacy, so the ISP option is a good one.
Step 3: Create Twitter Account
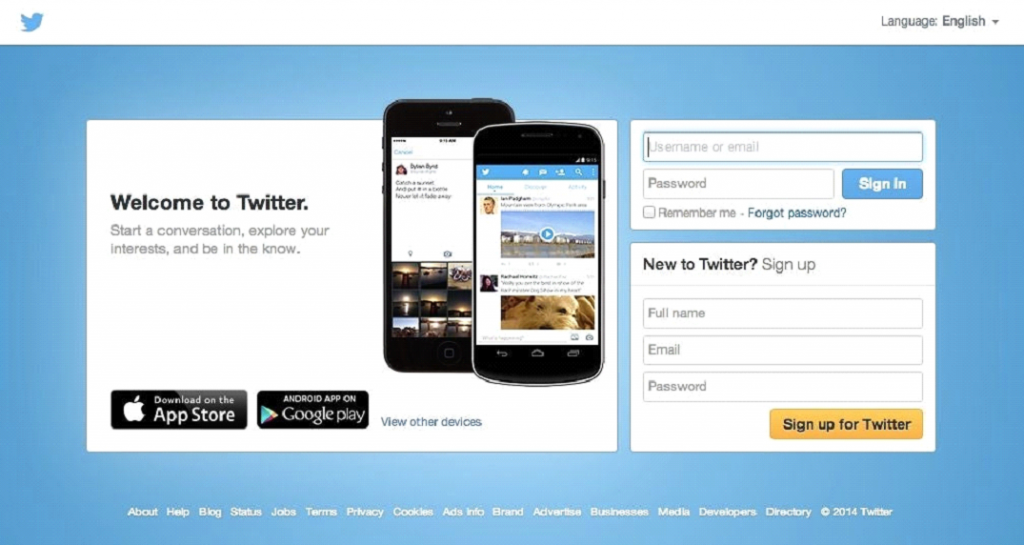
This is pretty straightforward, but login to Twitter and make a Twitterbot handle.
You’ll have to go through their steps of following several people or organizations and verification via email.
Step 4: Add Your Mobile Phone to Account
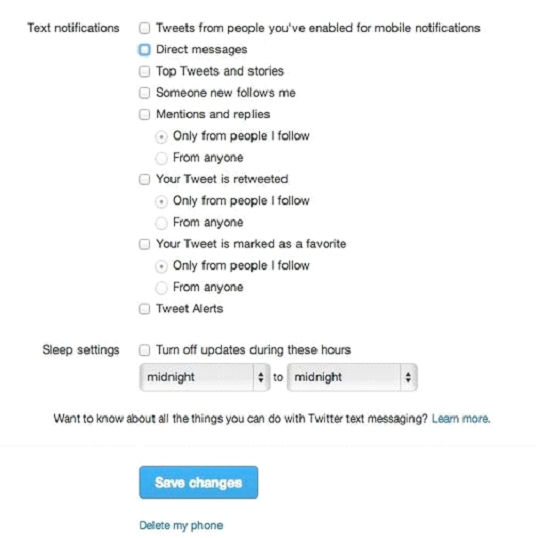
You’ll need this for a later step, but do it now. To activate a Twitter app, you’ll need a mobile phone number tried to your account for verification. We can remove this later.
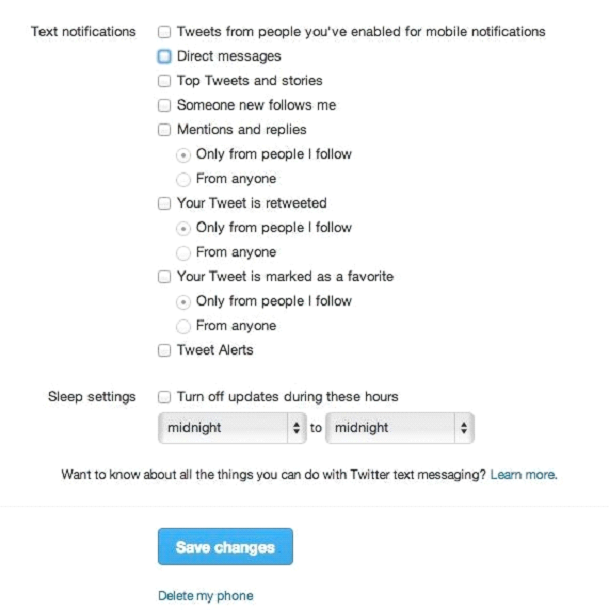
Go to Settings and check out the Mobile tab.
Add your phone number and verify the text with Twitter (GO 40404).
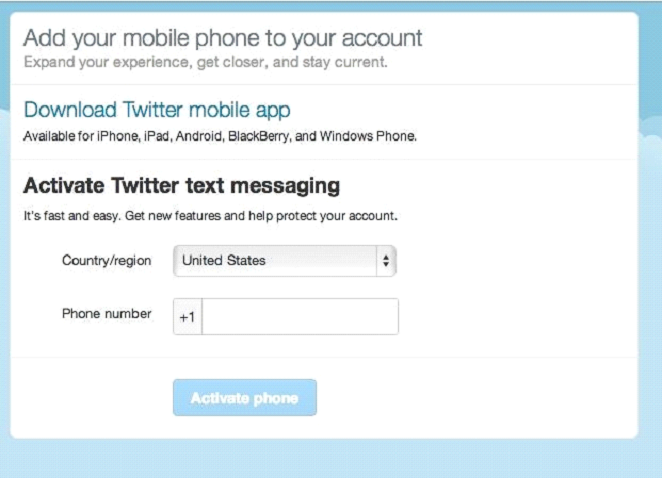
Turn off text notifications at the next dialog box and then leave this tab open in your browser.
Step 5: Create Twitter App

This may change if Twitter changes their application protocol, but here’s the procedure for the time being:
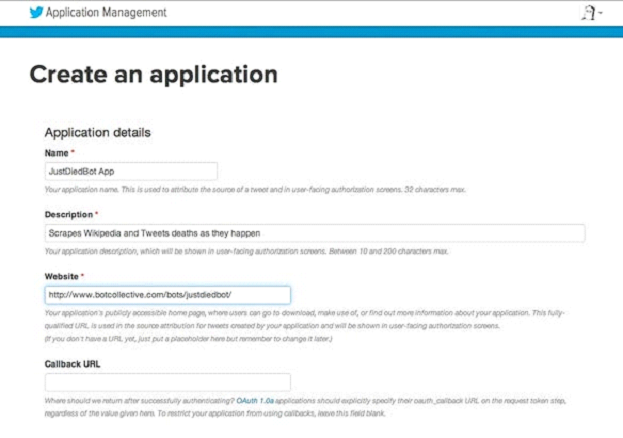
Go to https://apps.twitter.com/ and click on Create New App
At the Create an Application dialog box, enter:
- Name of your application
- Description
- Link to valid URL (this can be changed later) Leave the Callback URL field empty
Read the terms of agreement and agree to them and then OK the dialog
Step 6: Modify Permissions for Read/write
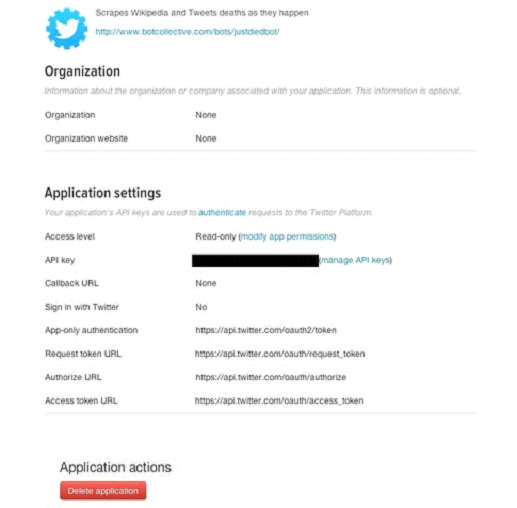

Twitter will take you to a page for Application Settings (I blacked out my API key for security reason).
The first thing you’ll need to do is change the permission, click on modify permissions on the Access level tab
Choose either Read and Write or Read, Write and Access direct messages, the latter if your Twitterbot will parse DMs.
Click on Update Settings. If you get the error that you need to add your mobile phone to your account, then you probably skipped the “Add mobile phone to account” step of this Instructable.
Click on the Details tab and then you’re back at the Application Settings dialog. Wait for a minute and click on Refresh until your Access level changes to Read/Write.
Step 7: Get Access Token and API Keys
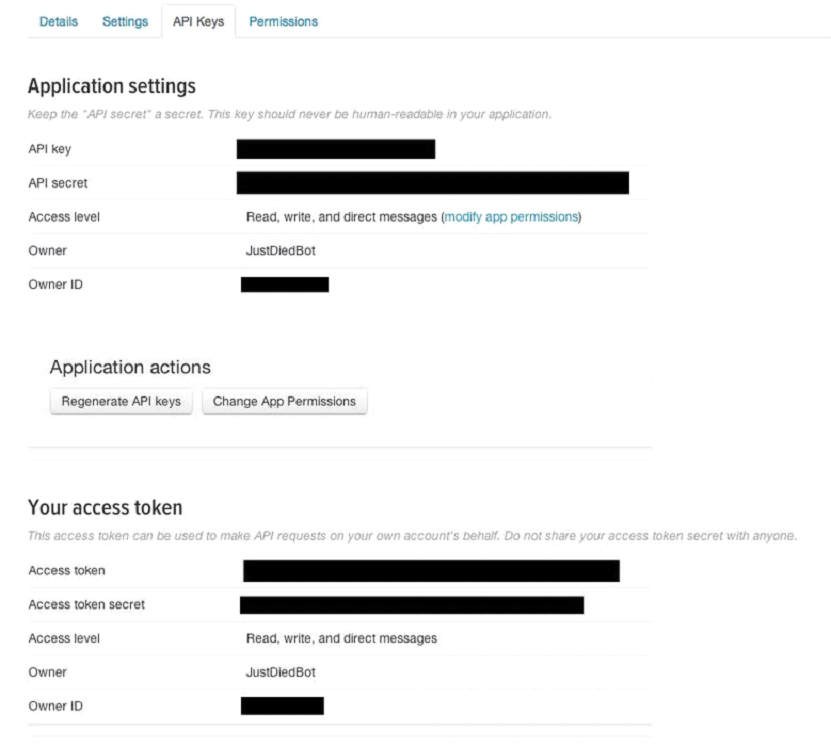
Click on the API Keys Tab, and you will see a dialog with your API keys. What we want to do now is create your Access Token. Click on the Create Access Token button and you will be given an Access token + secret.
This may take a minute, so hit refresh on your browser after a few seconds until you get a dialog box like this (once again, I’ve blacked out my private information).
Copy the alphanumeric strings for the API key, API secret, Access token and Access token secret to a secure location like 1Password at least to a text file or to Evernote.
Step 8: Delete Your Mobile Phone Number From the Account
We don’t need the mobile phone number on your Twitter account, so go back to this screen and choose Delete phone
Add TipAsk QuestionCommentDownload
Step 9: Create a Python Test Script
ssh into your Raspberry Pi, or else use the monitor. In this case, I prefer ssh, since I can copy-and-paste the application keys directly.
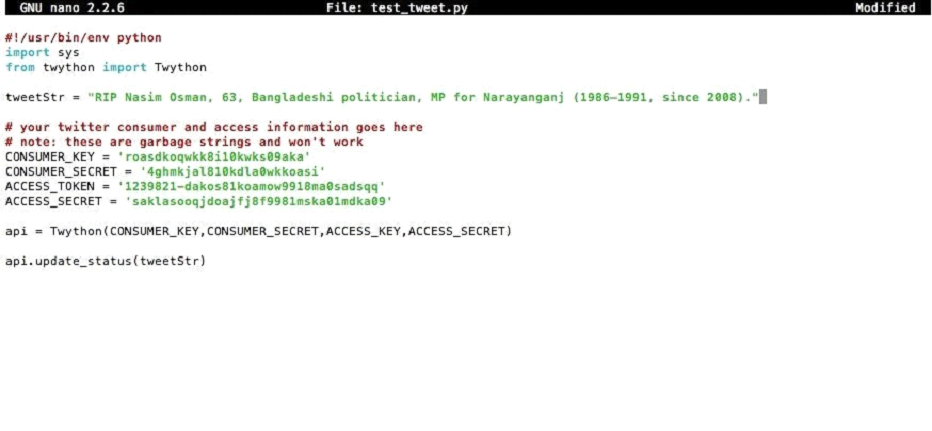
nano tweet_test.py
Try this script, only with your API key, API secret, Access token and Access token secret. Put a different string in than my RIP string — this is for testing JustDiedBot.
And substitute your own api key, api secret, access token and access token secret instead of using these.
#!/usr/bin/env python import sys
from twython import Twython
tweetStr = “RIP Peeraphan Palusuk, 68, Thai politician, Minister of Science and Technology (since 2013), MP for Yasothon (since 1985)”
#your twitter consumer and access information goes here
#note: these are garbage strings and won’t work
apiKey = ‘roasdkoqwkk8i10kwks09aka’
apiSecret = ‘4ghmkjal810kdla0wkkoasi’
accessToken = ‘1239821-dakos81koamow9918ma0sadsqq’
accessTokenSecret = ‘saklasooqjdoajfj8f9981mska01mdka09’
api = Twython(apiKey,apiSecret,accessToken,accessTokenSecret)
api.update_status(status=tweetStr)
print “Tweeted: ” + tweetStr
cntl-X, Return will save the script
Step 10: Run the Python Script and Check Out the Tweet

execute the Python script
python tweet_test.py
and you’ll see the tweetStr output. In the case of JustDiedBot, it is this:
Tweeted: RIP Peeraphan Palusuk, 68, Thai politician, Minister of Science and Technology (since 2013), MP for Yasothon (since 1985)
Now go to Twitter and you should see your Tweet!
Add TipAsk QuestionCommentDownload
Step 11: Improve on the Technique
Now you should have sent single tweet.
You’ll have to decide what kind of Twitterbot you’ll want to do. Quotebots are an easy way to start and the first 6 bots for The Bot Collective were quotebots.
Word of warning: You’ll want to be cautious about over-tweeting or spamming people with replies. This behavior might get your account suspended.
Done!