Week 4
Crash Sensor
⦁ Attach the crash sensor to the Micro:Bit.
For this you will need the crash sensor and the Cord with it and plug it into the first port. The crash sensor is the part with the metal piece that you can press down.
⦁ Make the Micro:Bit display an X, and a check mark when you press the switch on the crash sensor.
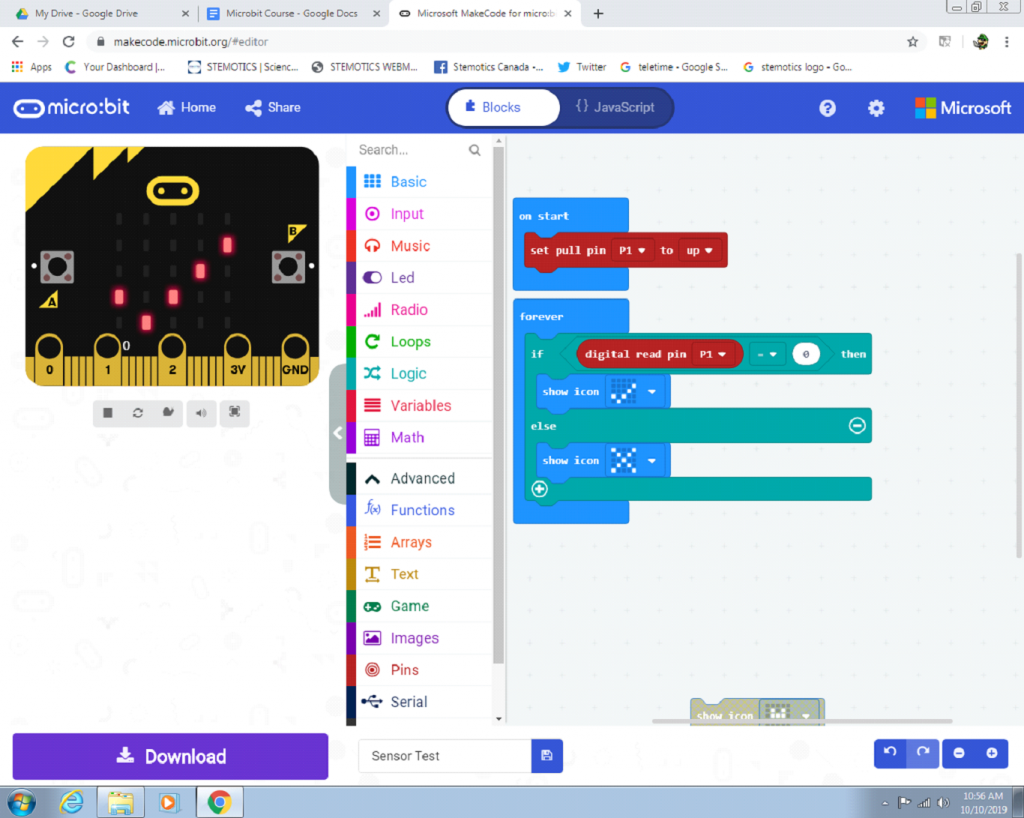
First you will need to set up the crash sensor in your code. To do this add the “set pull pin” block under start and set it up.

Next you will need a forever loop that will be constantly checking to see if the crash pin has been pressed. You will need an” if else” block found under the logic menu. Beside the “if” you will need an equals block found under logic menu and then have a “digital read pin” block on the left side and set it to P1. Then on the right set it to 0. This means that if the pin signal equals 0 so when it is pressed it will do the thing underneath. In this case we want to make a check mark so you have to put a show icon in. Finally, add a show icon for an X then when the crash isn’t being pressed it shows that.
LED
⦁ Detach the crash sensor and attach the LED to the Micro:Bit.
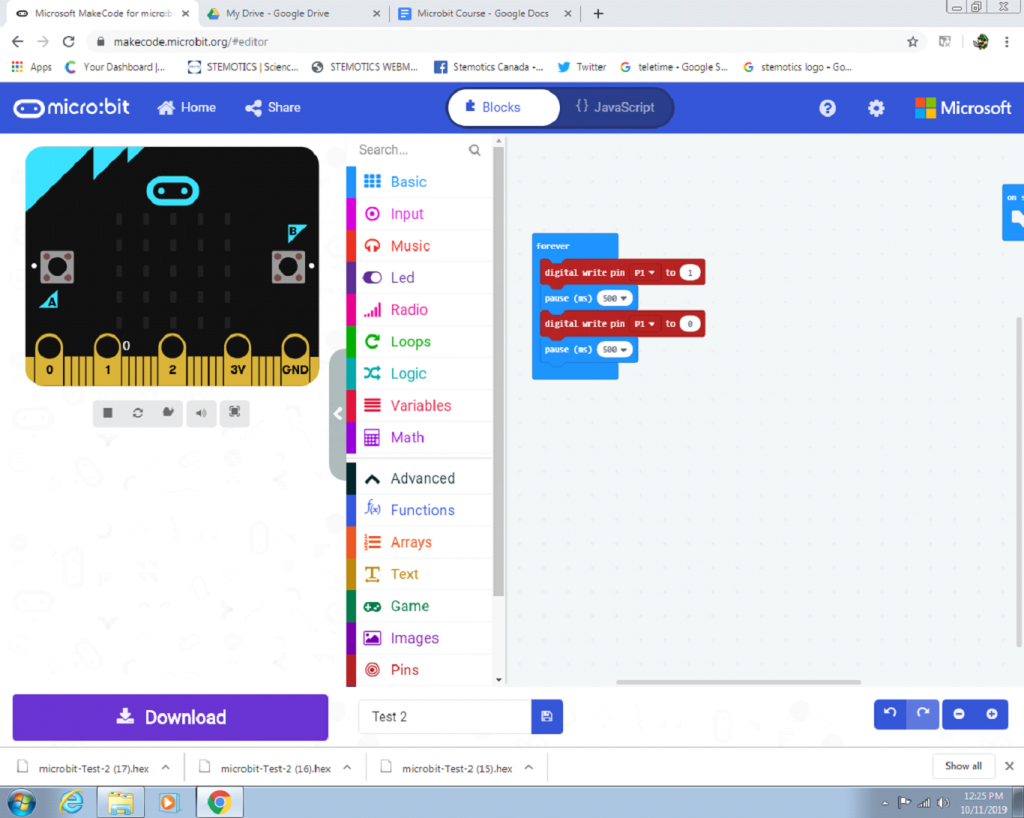
⦁ We will create a program that will make the LED flash. To do this, you’ll need two “digital write pin” blocks, which can be found in the Pins menu in the Advanced section. Put both of them in the “forever” block and set the number in the white bubble of the first block to one, and the number in the white bubble of the second block to 0. Then, put a “pause” block after each “digital write pin” block. And set both of them to 500 ms.
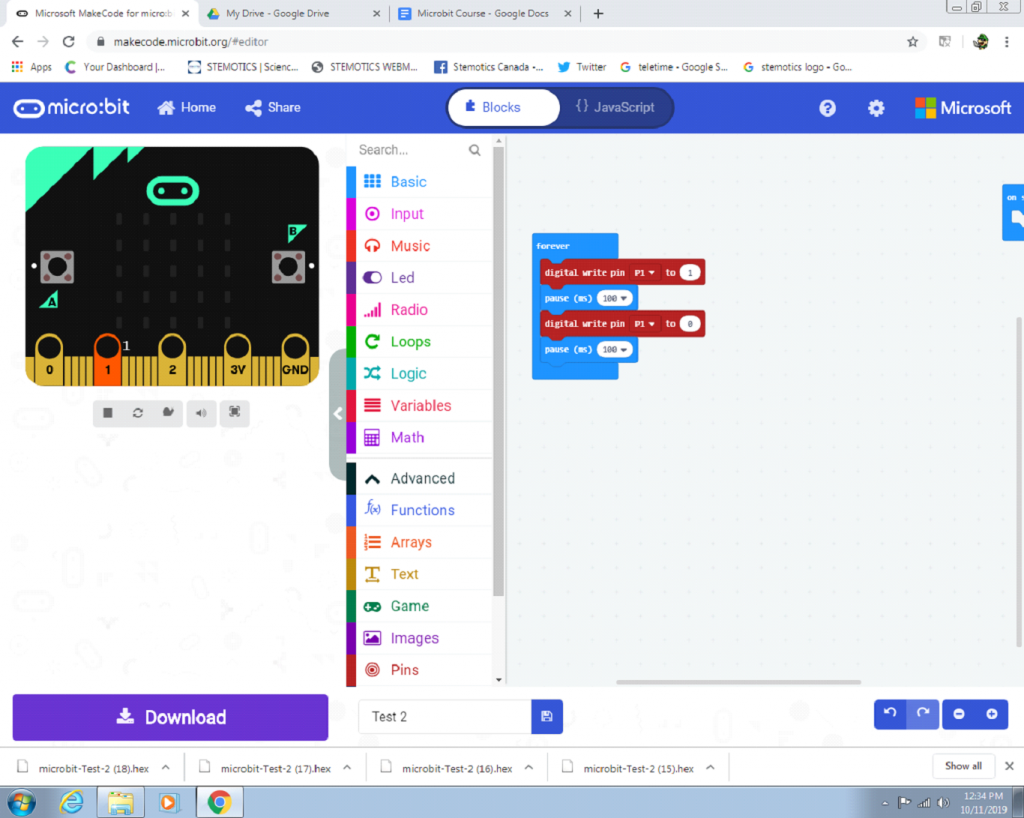
⦁ Change the Flash Rate of the LED
To change how fast the LED flashes, set the “pause” blocks to a lower number, like 100 ms, to make it flash faster, or set them to a higher number, like 1 or 2 seconds, to make it flash slower.
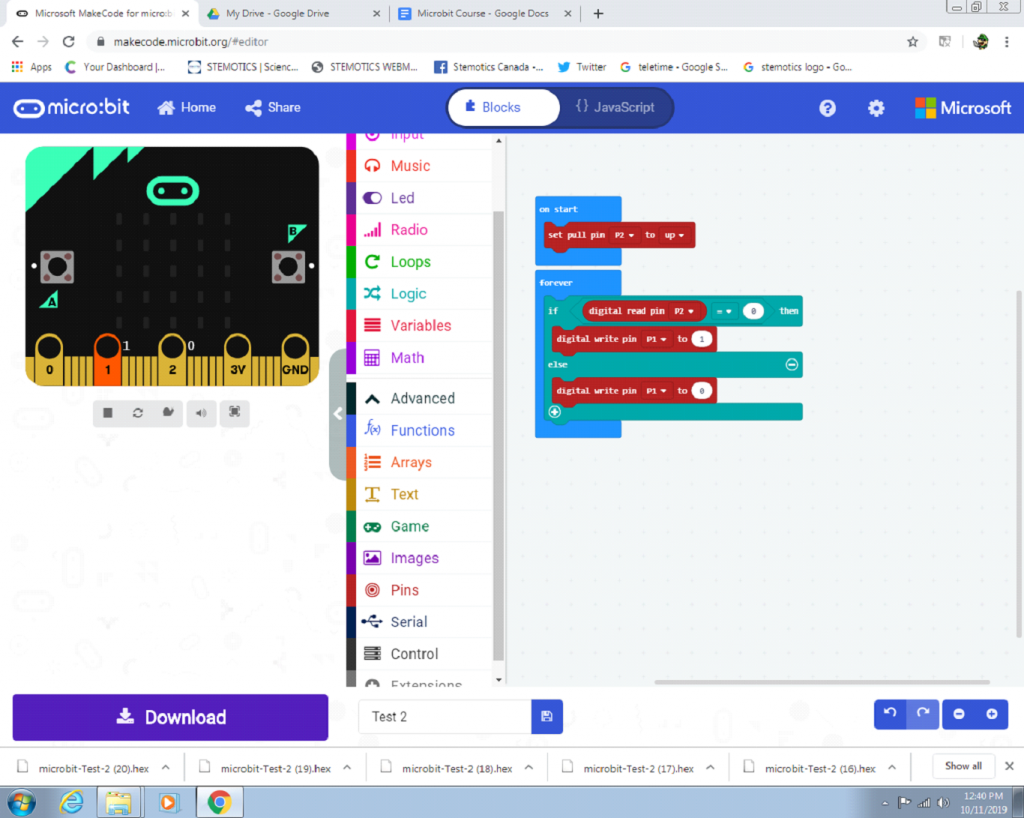
⦁ Turning on the LED With the Crash Sensor
First, attach the crash sensor to port two on the Micro:Bit with another cord. Then, create the crash sensor program you learned earlier, but this time, put the “digital write pin” blocks into the “if else” block and assign the “set pull pin” to port 2. When you run the program, you should be able to make the LED light up when you press the switch.
⦁ Using the crash sensor to stop the servo
The servo is a motor that can turn the piece on top 180 degrees and back again. This program will enable you to stop the servo from rotating when you press on the crash sensor.