Rocket
Creating a Rocket
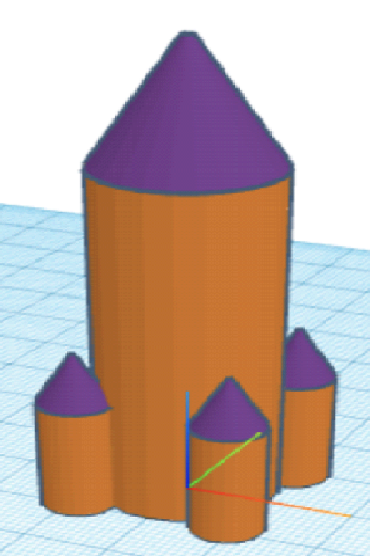
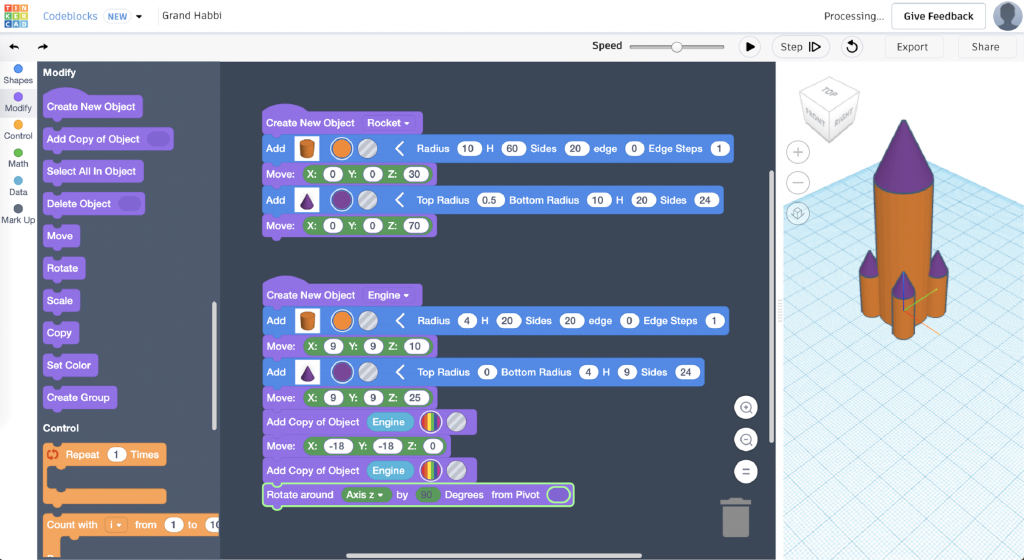
You will need to create a new design in Tinkercad Codeblocks to start creating a Rocket. The design will look like the image on the right when we are finished.
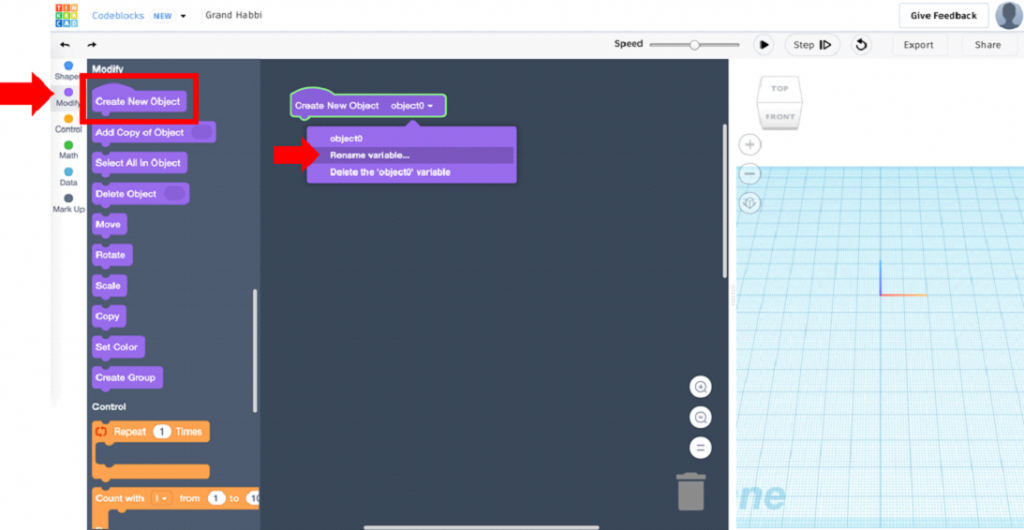
We are going to create objects to build our Rocket. Under the Modify tab, drag the Create New Object block into the Coding Space. The name of the object will be set to “object0”. This can be changed to make it easier to identify different objects in the project. Click where it says “object0” to open a drop down menu and select “Rename variable…”, shown below.
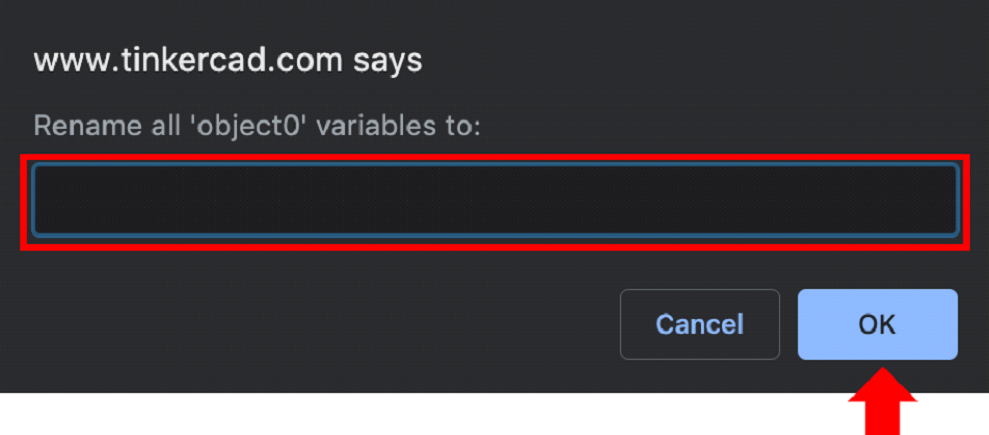
Enter the new name into the window that pops up and select OK.

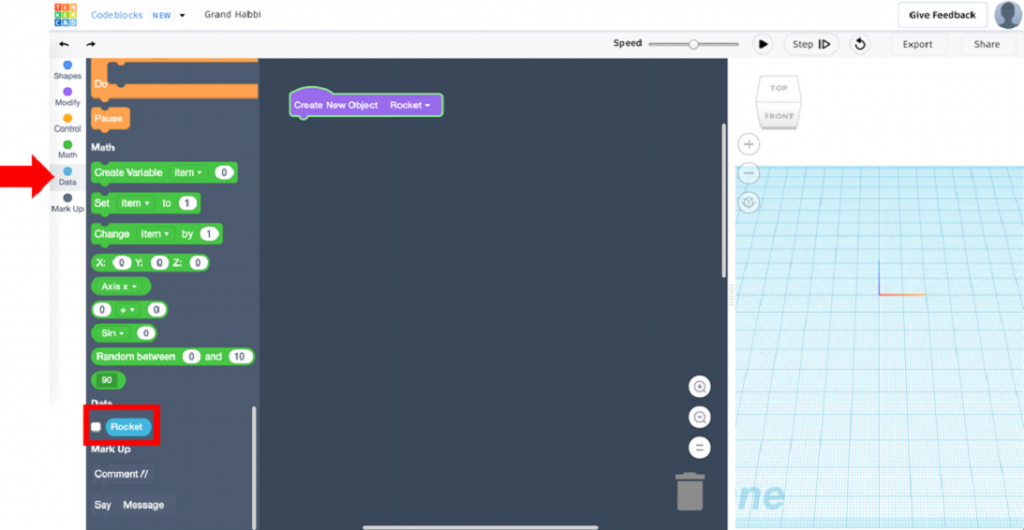
Each Create New Object block added will show up under the Data menu in the toolbar on the left. The Data will be saved under the name you have selected so it is useful to rename objects you create.
To start building the rocket we will need to add a Cylinder block from the Shapes menu. Click on the arrow, >, to see the shape options. Change the Height to 60. Under the Modify menu, use a Move block to move the body of the rocket up to the surface Workplane. This will be half of the height of the shape, so change the Z value to 30.

Next we need to add a point to the top of the rocket using the Cone shape.
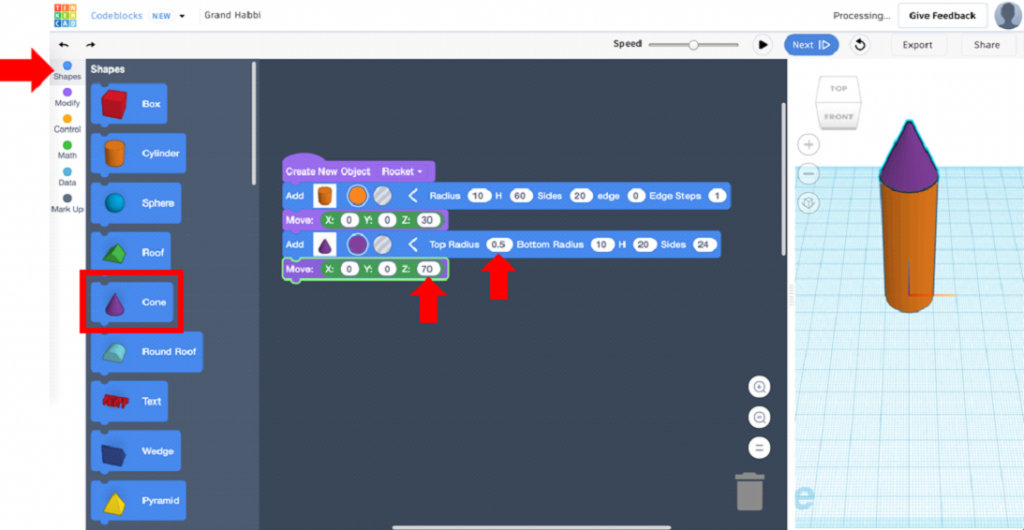
Under the Shapes tab drag a Cone Block into the Coding Space.
Use the arrow, >, and change the Top Radius to 0.5. Under the Modify tab drag a Move Block into the Coding Space and change the Z value to 70, shown on right.
Press Play to see your design on the Workplane.
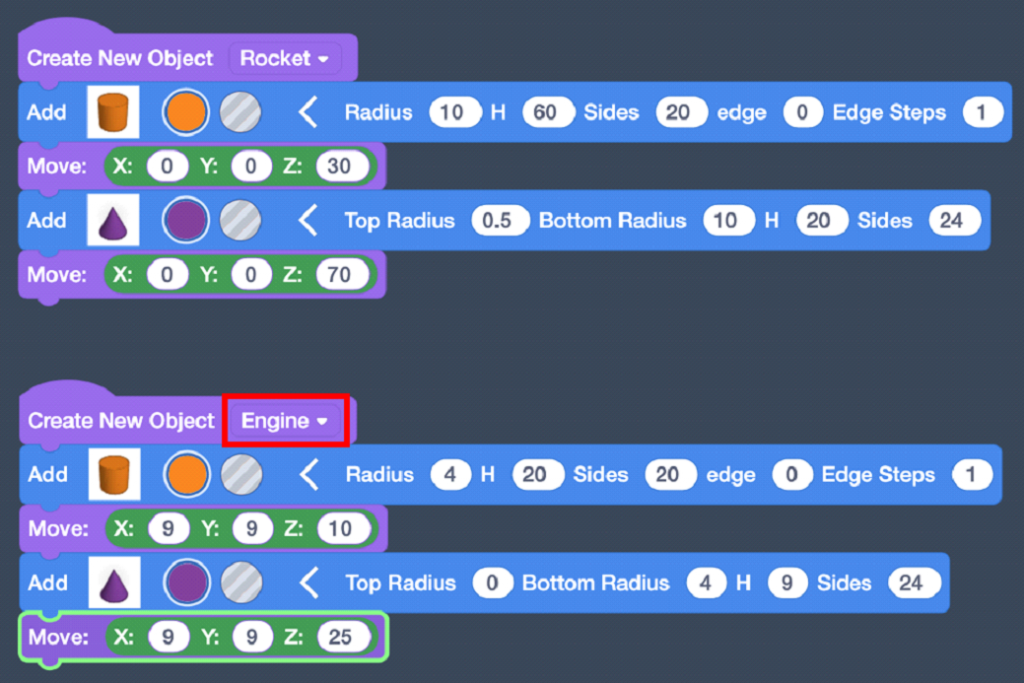
We need to create the engines. In order to do this we will repeat the same process used to create the body of the rocket, changing some of the dimensions. The Coding Space should appear as below. Remember to name your new group.
Under the Modify tab drag an Add Copy of Object Block into the Coding Space. The Block has an empty area for a Data Block.
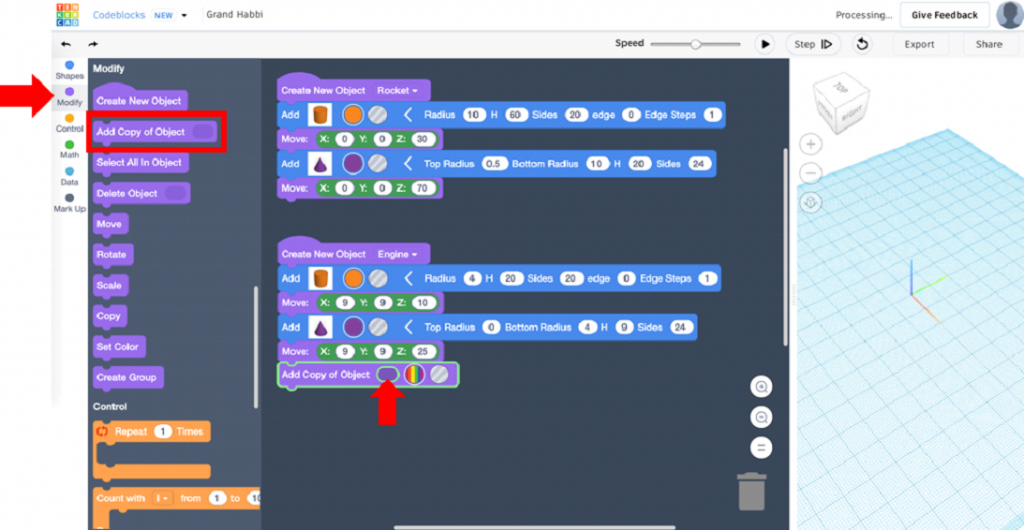
You can drag the Engine Block from the Data tab into that empty area to Copy the defined object. The Block in the Coding Space will now appear as below.

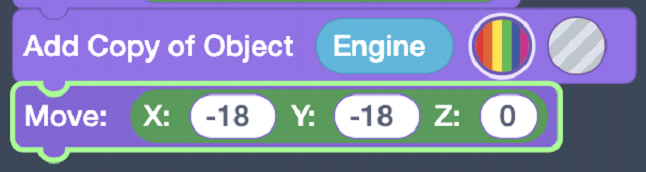
The object will be copied at the same location so you must move the copy to another point on the rocket. Drag a Move Block from the Modify tab and change the values to
X = -18, Y = -18, Z = 0. The Block will look like the code below.
If you run the program, you should see a rocket with two engines on opposite sides of one another. We need to add two more engines. We did not define a new object so adding another copy of Engine will replicate the entire code above. Therefore we only need to add one more Add Copy of Object Block, along with the Engine Block from the Data tab. Now we will drag a Rotate Block from the Modify tab into the Coding Space, change the axis of rotation to Axis z, and ensure that it is rotating 90 degrees. Run the code again by pressing the Play button to see the rocket in the Workplane.
Congratulations, you have made a Rocket!