Week 1: Raspberry Pi-Intro
Introduction
The Raspberry Pi is a cross between a typical embedded system – like an Arduino – and a desktop computer. The Raspberry Pi is developed in the United Kingdom by the Raspberry Pi Foundation to promote the teaching of basic computer science in schools and in developing countries.
The Raspberry Pi is a great platform on which to learn Linux and programming. It’s also a powerful solution for many “Internet-of-Things” projects out there, because it’s so easy to get connected to the Internet. It can run Python scripts, or even compile programs written in C. It’s a full-blown computer!
And, of course, it can be used to play games.
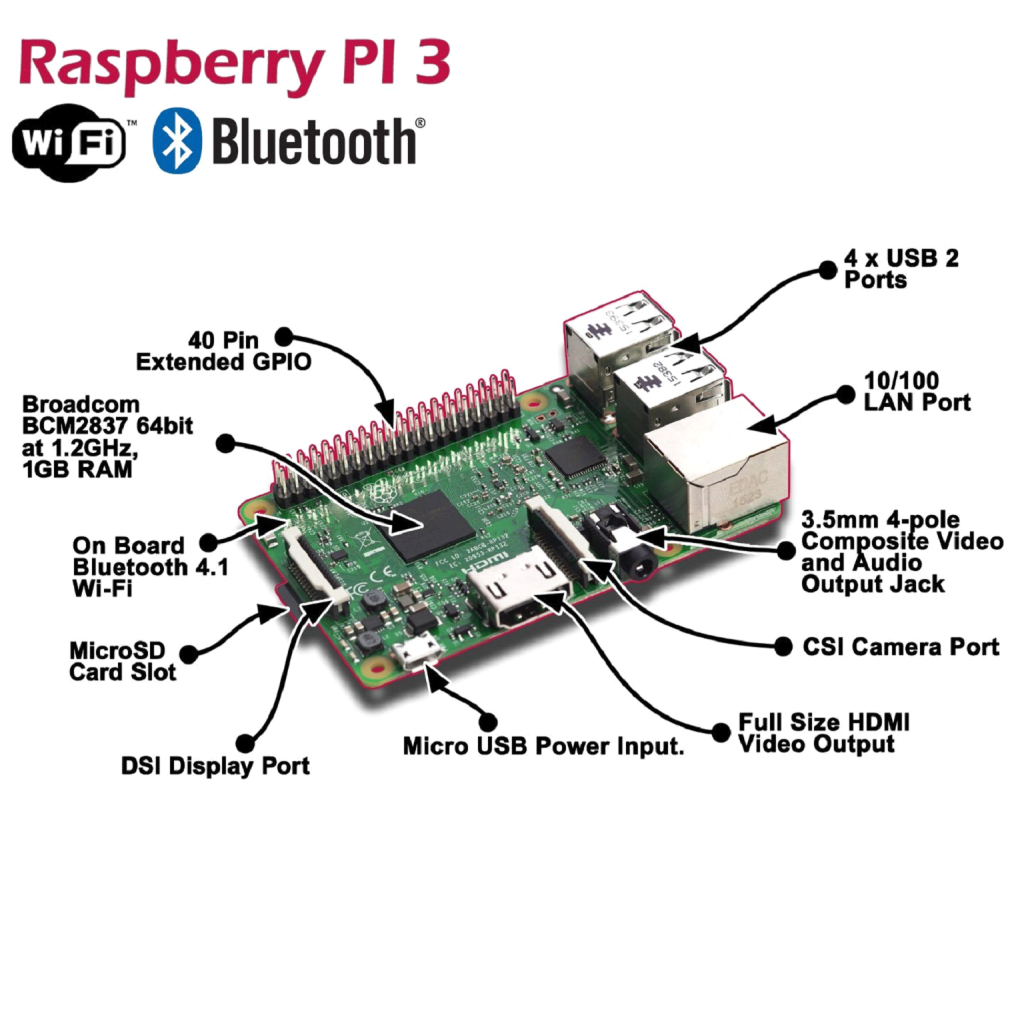
Raspberry Pi-3 Hardware
⦁ Faster 64 bit processor running at 1.2 GHz
⦁ On-board Bluetooth Low Energy (BLE)
⦁ Built in Wi-Fi
⦁ HDMI input
⦁ 4- USB Port
⦁ LAN Port
Download NOOBS
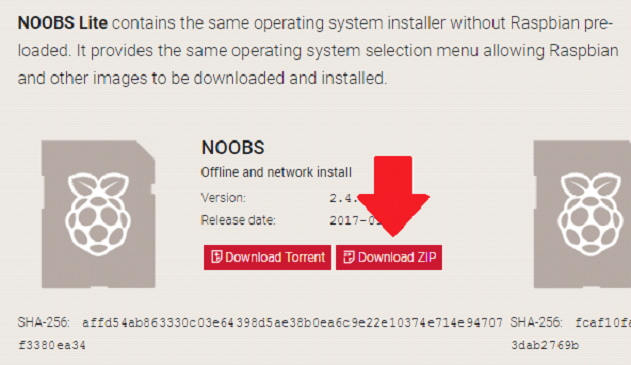
Raspberry Pi’s New Out of Box Software (NOOBS) is recommended for first time Pi users (and even advanced ones). It includes a variety of useful operating system images (including Raspbian), and really simplifies the process of installing them.
www.raspberrypi.org/downloads/
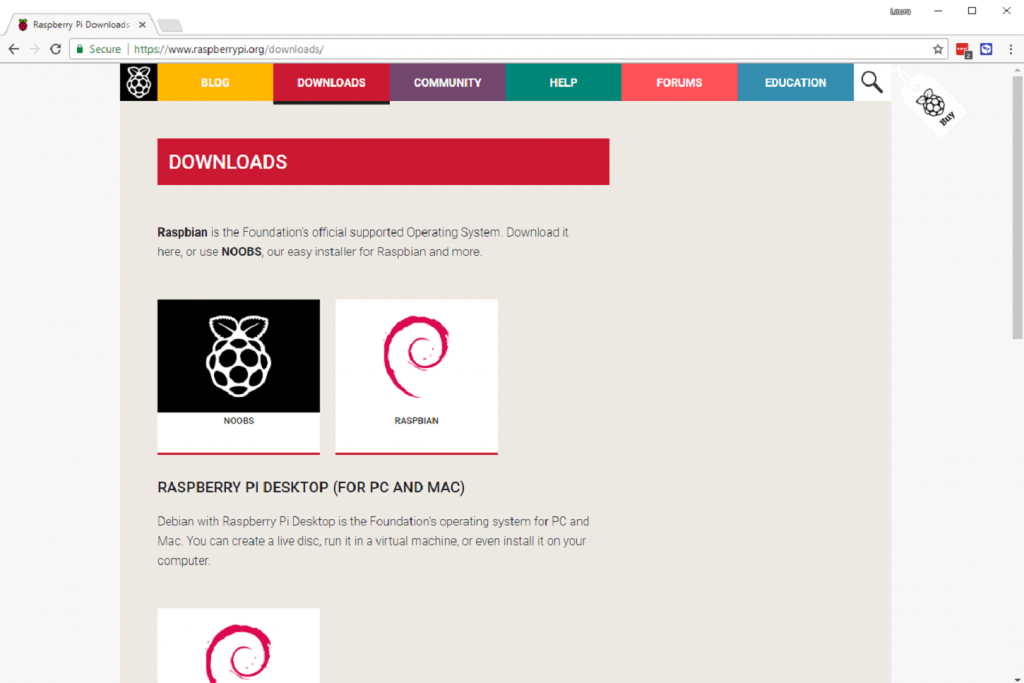
Head over to the Raspberry Pi downloads page, and download the most recent NOOBS (offline install) image (NOOBS_v2_4_5.zip). It should be a 1.5 GB ZIP folder.
Extracting NOOBS from the zip archive
Next, you will need to extract the files from the NOOBS zip archive you downloaded from the Raspberry Pi website.
Go to your Downloads folder and find the zip file you downloaded.
Extract the files and keep the resulting Explorer/Finder window open.
Copying the files
Now open another Explorer/Finder window and navigate to the SD card. It’s best to position the two windows side by side.
Select all the files from the NOOBS folder and drag them onto the SD card.
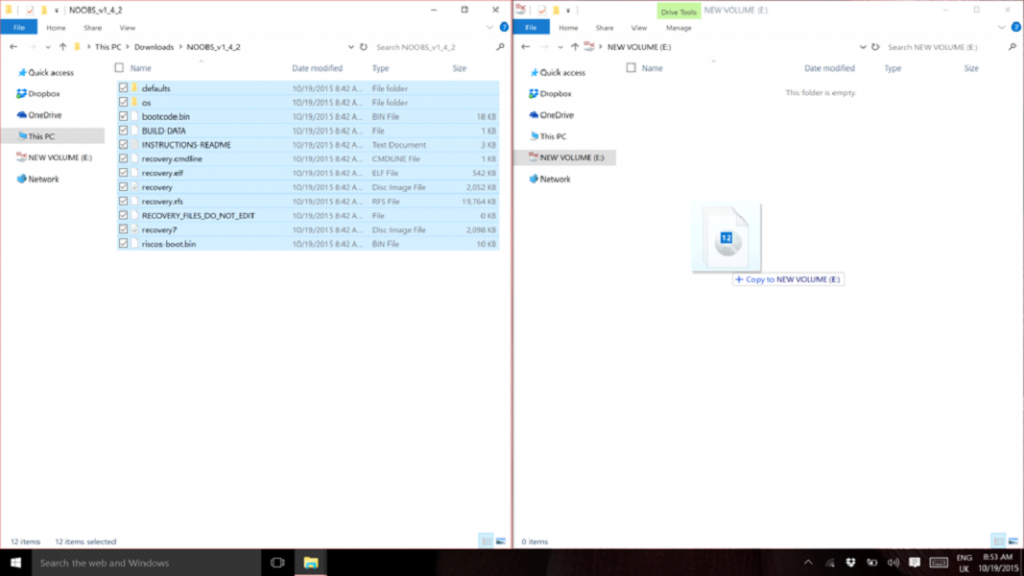
That is one prepared SD card. Time to set up the Pi.
Image Install Selection
The first step in NOOBS setup is selecting which images to install. Booting from NOOBS
Once the files have been copied over, insert the micro SD Card into your Raspberry Pi, and plug the Pi into a power source. You will be offered a choice when the installer has loaded. You should check the box for Raspbian, and then click Install.
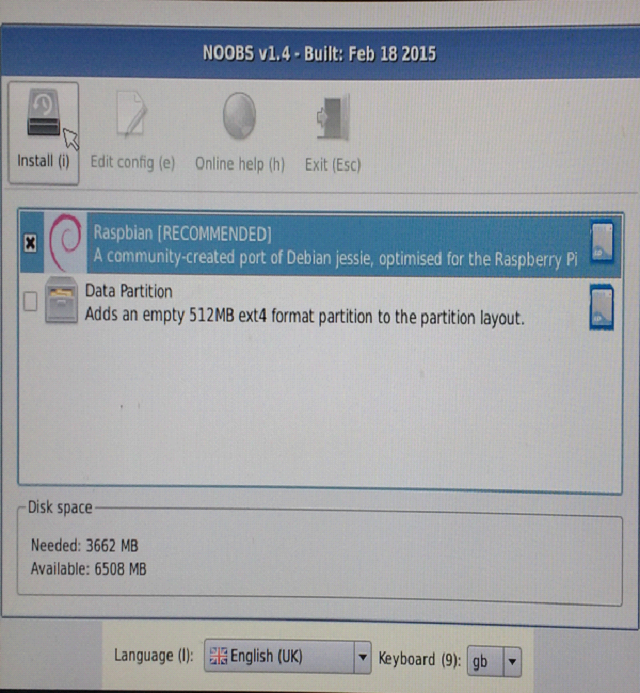
The installation procedure will take a while (30 minutes to an hour).
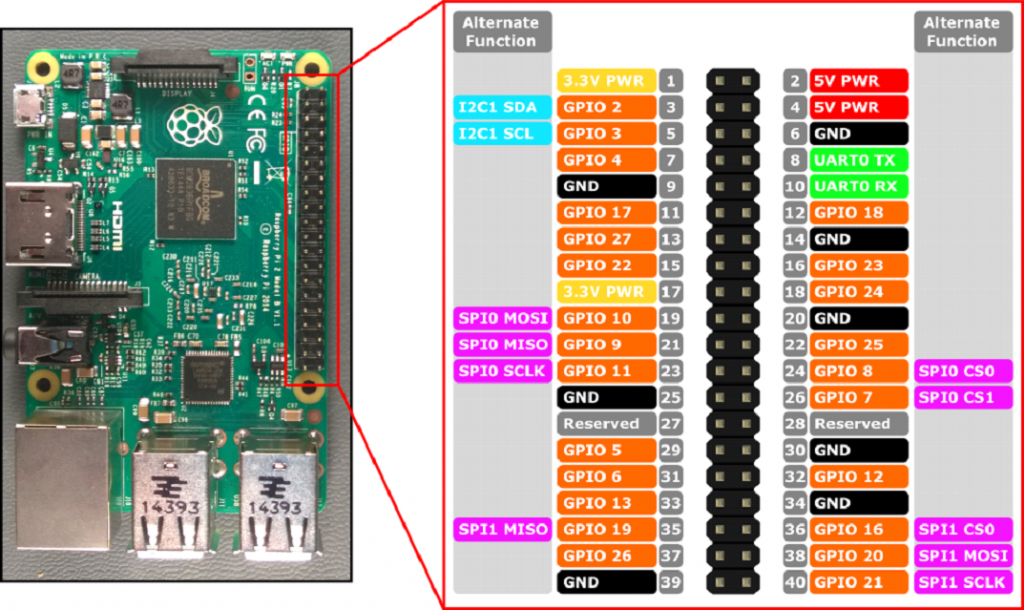
Raspberry PI- 2 Model B+ Pinout