Week 2 – Potentiometer
Experiment 2: Reading a Potentiometer
Arduino – Week-2
Name: _______________________________________________________________
Introduction
In this circuit you’ll work with a potentiometer.
A potentiometer is also known as a variable resistor. When powered with 5V, the middle pin outputs a voltage between 0V and 5V, depending on the position of the knob on the potentiometer. A potentiometer is a perfect demonstration of a variable voltage divider circuit. The voltage is divided proportionate to the resistance between the middle pin and the ground pin. In this circuit, you’ll learn how to use a potentiometer to control the brightness of an LED.
Parts Needed
You will need the following parts:
⦁ 1x Breadboard
⦁ 1x RedBoard or Arduino Uno
⦁ 1x LED
⦁ 1x 330Ω Resistor
⦁ 6x Jumper Wires
⦁ 1x Potentiometer
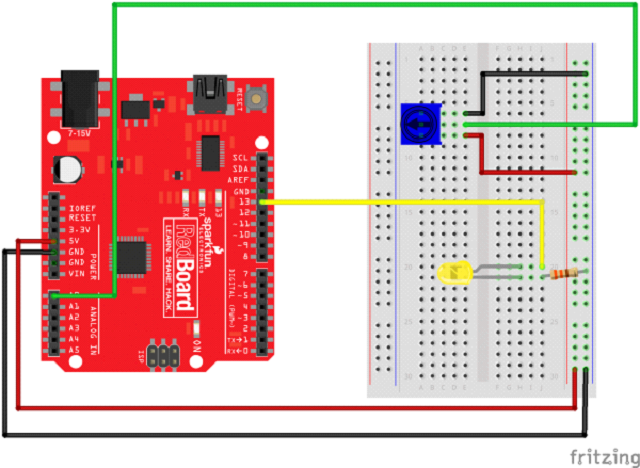
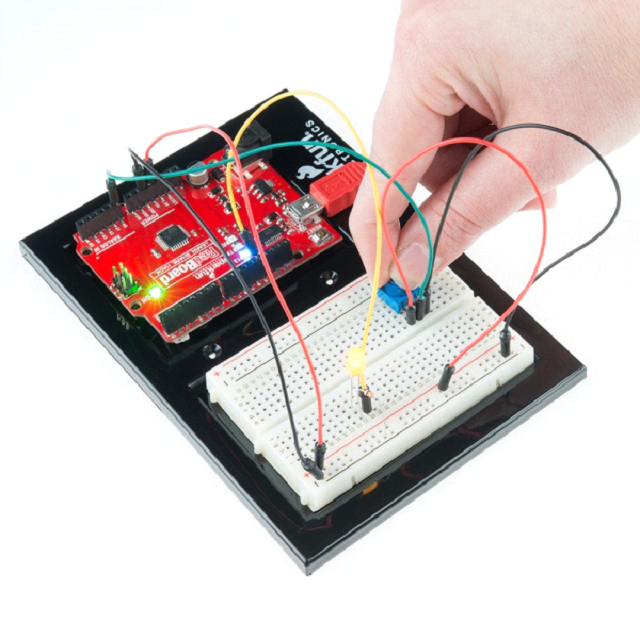
Hardware Hookup
Ready to start hooking everything up?
Check out the diagram and to see how everything is connected.
What You Should See
You should see the LED blink faster or slower in accordance with your potentiometer. If it isn’t working, make sure you have assembled the circuit correctly and verified and uploaded the code to your board, or see the troubleshooting section.
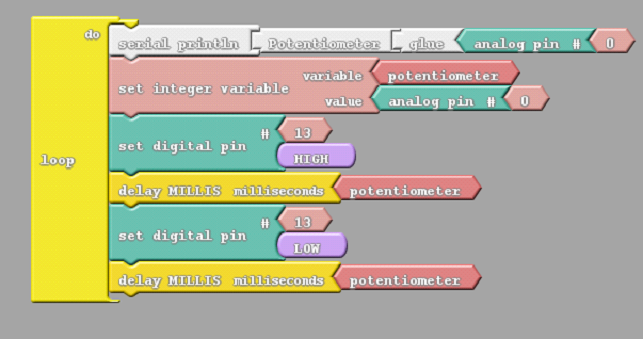
Program
To display the potentiometer reading

To Turn the LED ON and OFF depending on the value of the potentiometer
Challenge-1:
Turn on different LED when the potentiometer rotates.
Challenge-2:
| If the value of the potentiometer is between | 800 to 1000 | Turn ON Red LED |
| If the value of the potentiometer is between | 600 to 800 | Turn ON White LED |
| If the value of the potentiometer is between | 400 to 600 | Turn ON Yellow LED |
| If the value of the potentiometer is between | 200 to 400 | Turn ON Green LED |
| If the value of the potentiometer is between | 0 to 200 | Turn ON Blue LED |