Week 3
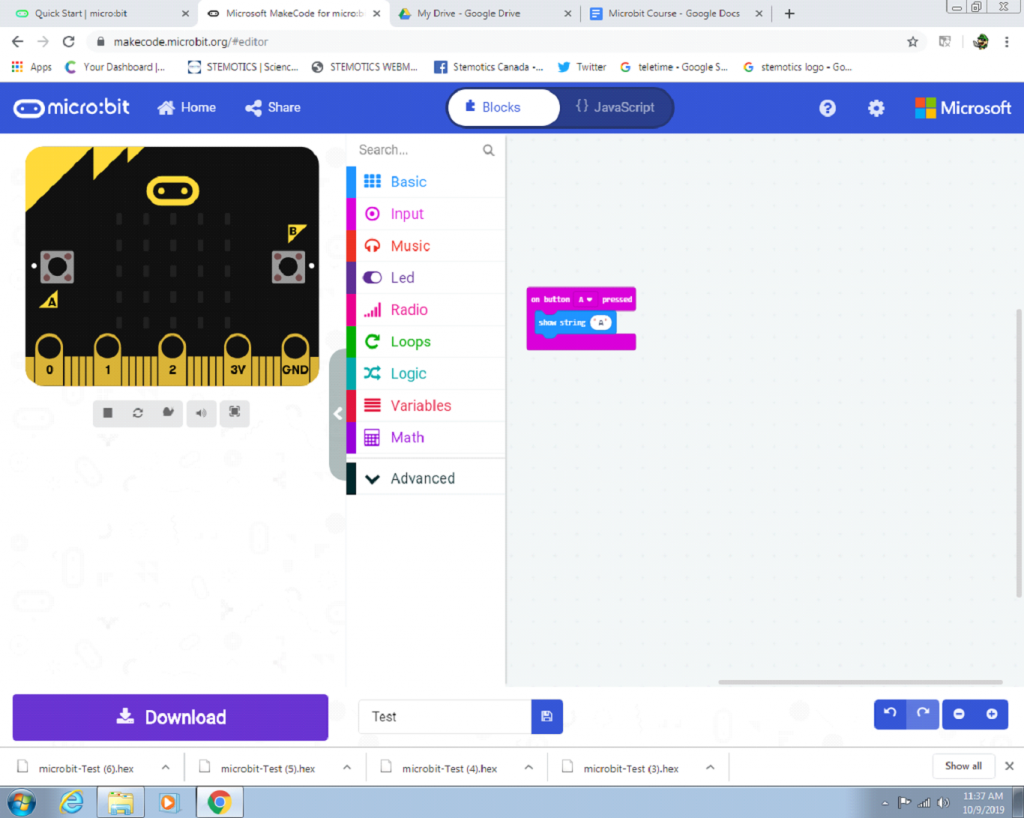
⦁ First make it so that when you press A Microbit displays the letter A
To do this you need to grab the “on button __ pressed” block from the input menu. Select the A button and drag a “show string” block to it and put A in it.
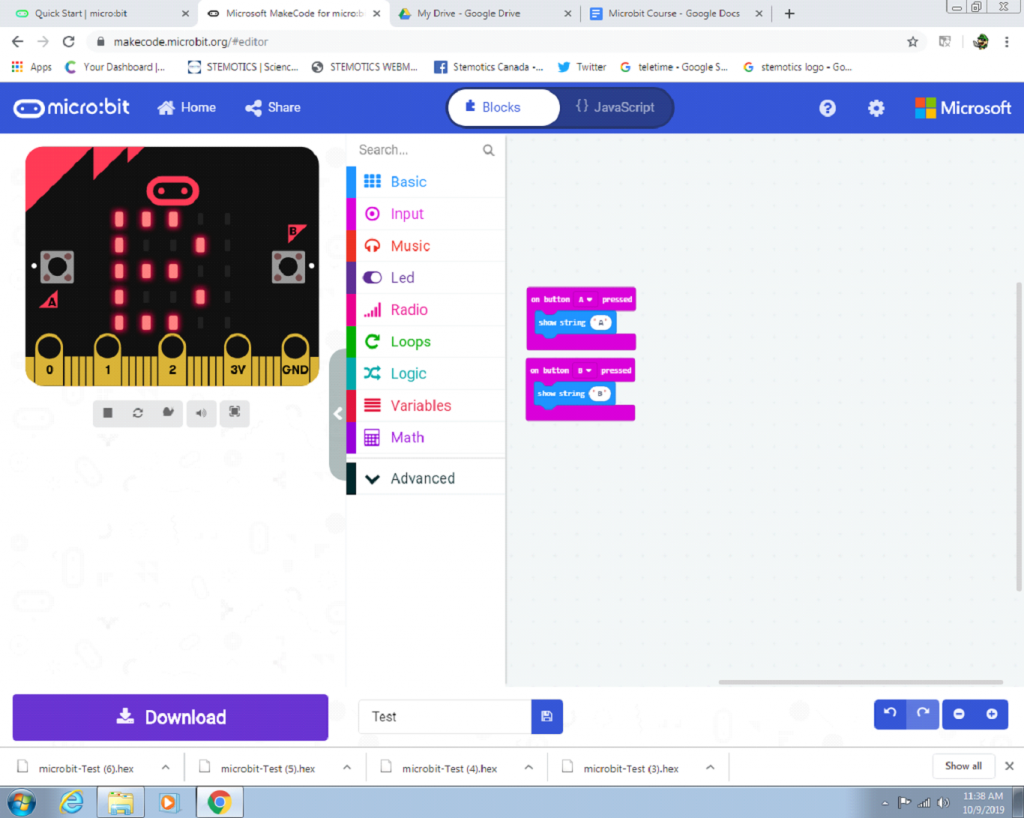
⦁ Add on to that and make it so that when you press B micro bit displays the letter B
This is the same as the first step just switch the button pressed to B and display the letter B.
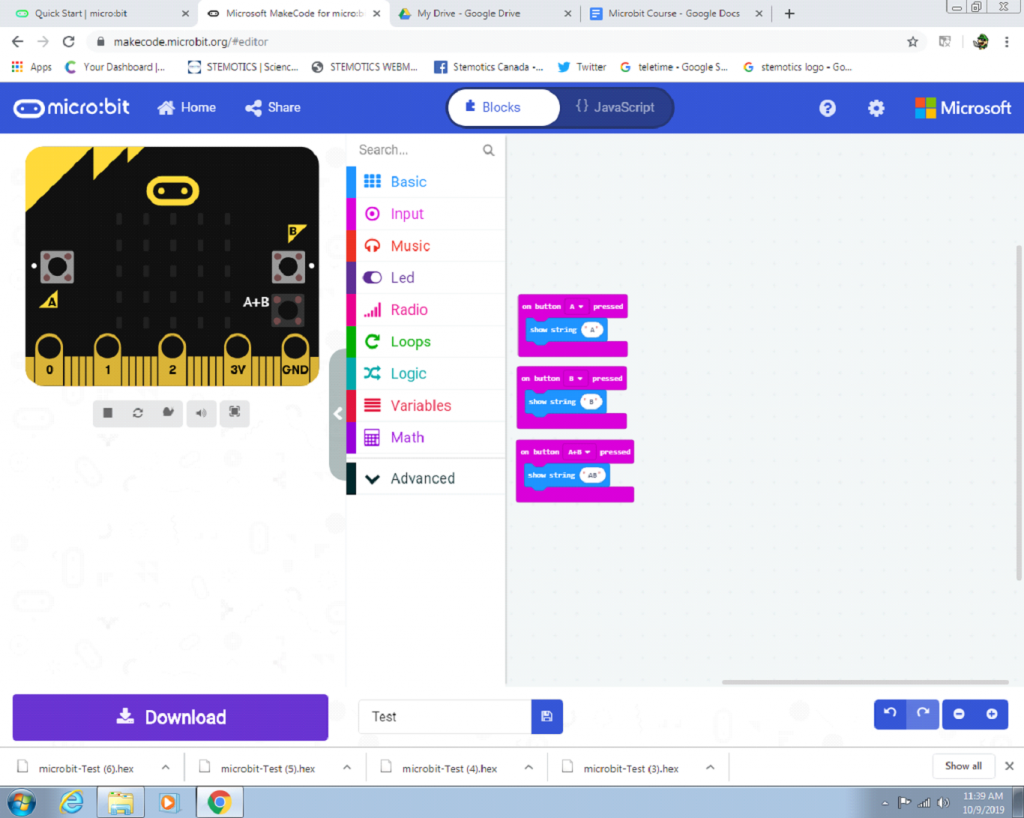
⦁ Then add on to make it when you press A and B at the same time it displays “A B”
Do the same thing as before, but switch the button pressed to A+B and display the letters A and B in the same string.
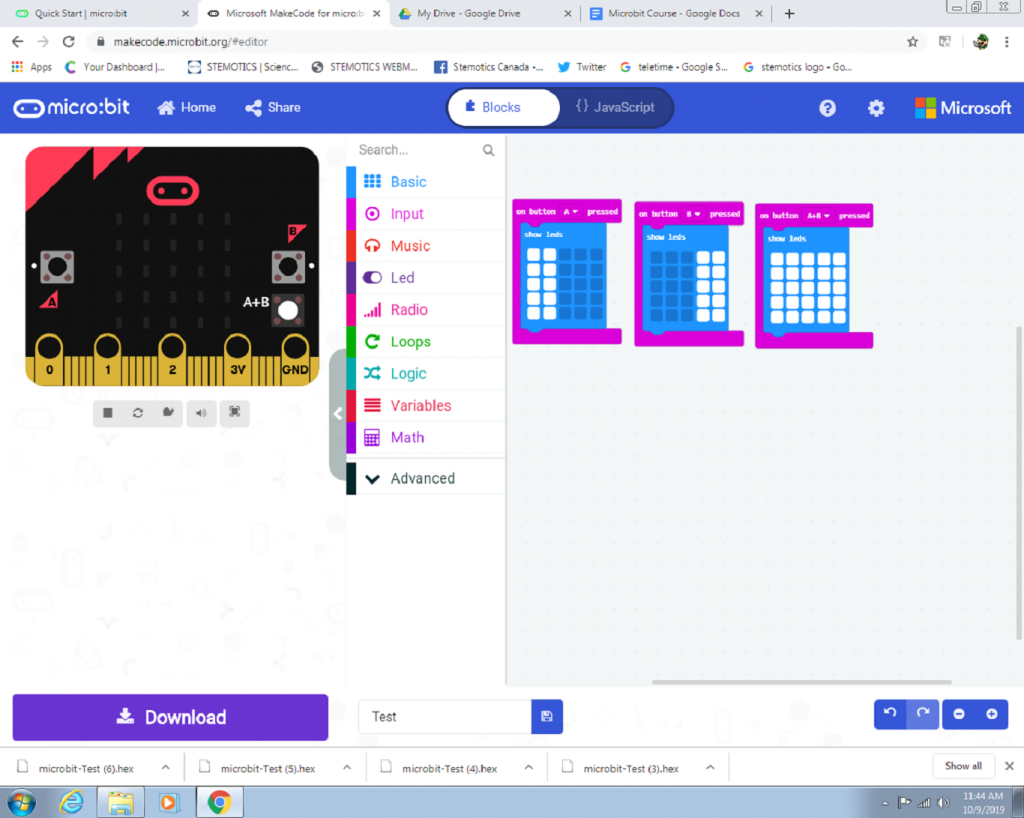
⦁ Now try to make it so that when you press A the LEDs on the left side light up when you press B the right side of the screen lights up, and finally when you press both the whole screen lights up. Just keep the 3 “on button __ pressed” and add in “show Leds” blocks into it instead. Under the A button pressed, select the LEDs on the left side. Under the B button pressed, select the LEDs on the right side. Then under A+B pressed select all the LEDs.
⦁ Let’s try adding some music into the mix and have it so that when you press A you play a High B note, when you press B it plays a Low C note
To do this you will need to get the “play tone” block from the Music menu and set them to the desired notes.
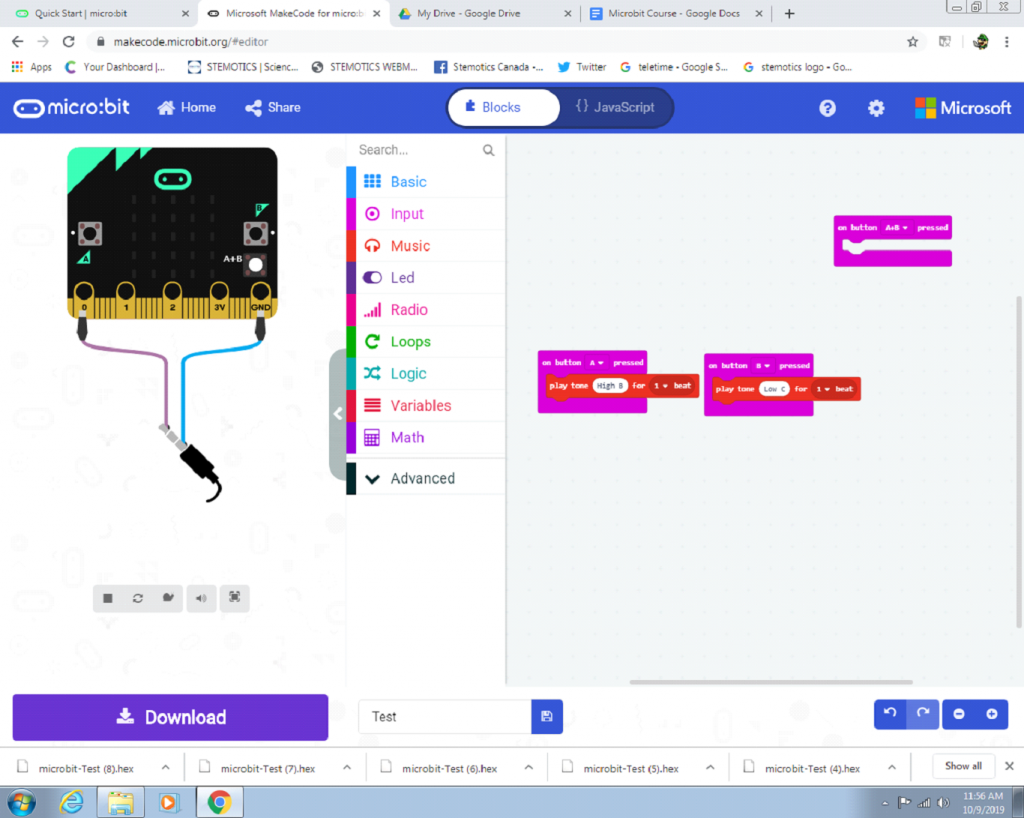
⦁ Now that you can add notes when you press a button, try to have it play a note and display a symbol when it does.
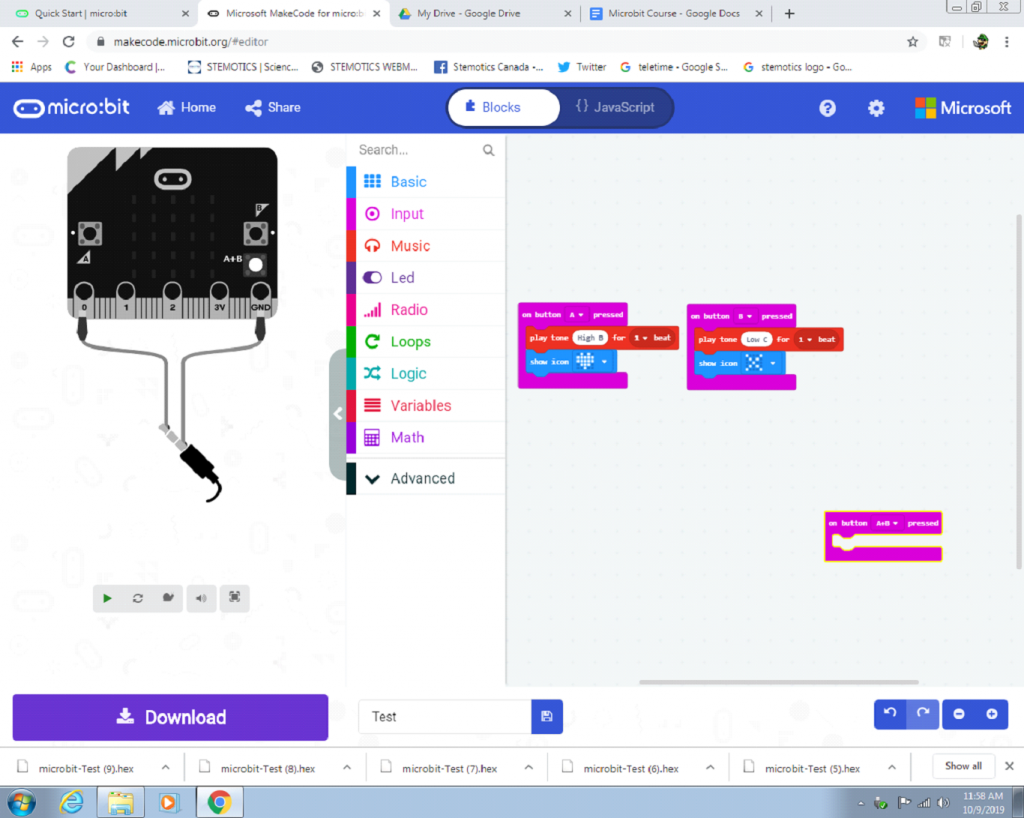
⦁ Putting it all together:
Now change the program so that the Micro:Bit displays the word “Yes” and a checkmark icon while playing the “entertainer” melody in the background when you press button A, display the word “No” and an X icon while playing the “wawawawaa” melody in the background when you press button B, and play a Middle A tone and display the word “Error” when you press both buttons at the same time.
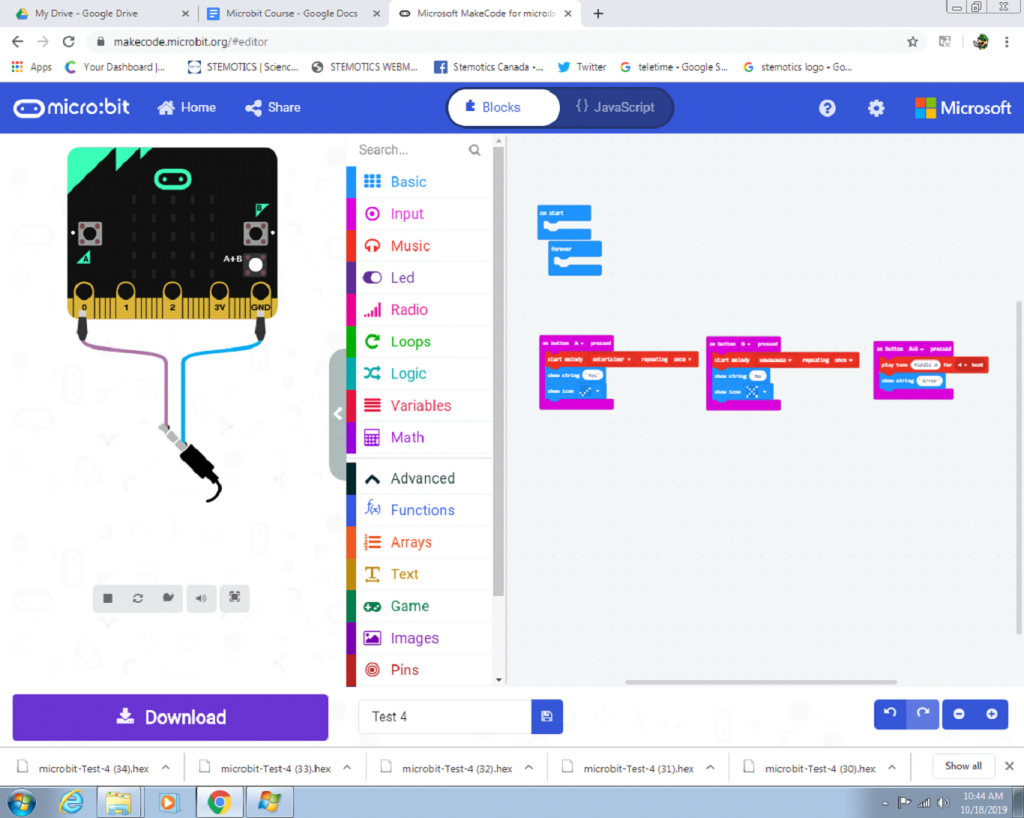
⦁ When you’re done with all of that, try creating your own wacky combinations of icons, tones, melodies, or strings for the Micro:Bit to do when you press either button or both buttons. Just be creative and have fun with it.
