Week 3: Raspberry Pi-RGB
Introduction

You know what’s even more fun than a blinking LED? Changing colors with one LED. RGB, or red-green-blue, LEDs have three different color-emitting diodes that can be combined to create all sorts of colors. In this circuit, you’ll learn how to use an RGB LED to create unique color combinations. Depending on how bright each diode is, nearly any color is possible!
GPIO 2 3 4
But which pin is which color? Pick up the RGB so that the longest pin (common ground) is aligned to the left as shown in the graphic below. The pins are Red, Ground, Green, and Blue – starting from the far left.
Parts Needed
You will need the following parts:
1x Breadboard
1x Raspberry Pi 3
1x LED – RGB Common Cathode
3x 330Ω Resistors
5x Jumper Wires
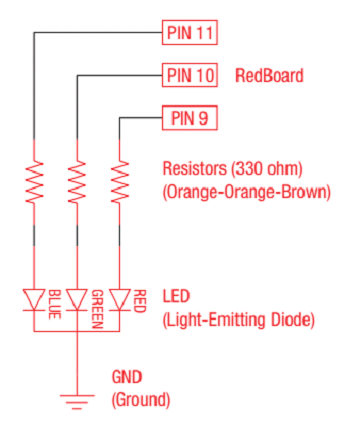
Circuit Diagram
Ready to start hooking everything up? Check out the Fritzing diagram and hookup table below, to see how everything is connected.
GPIO Pin 2
      GPIO Pin 3
GPIO Pin 4 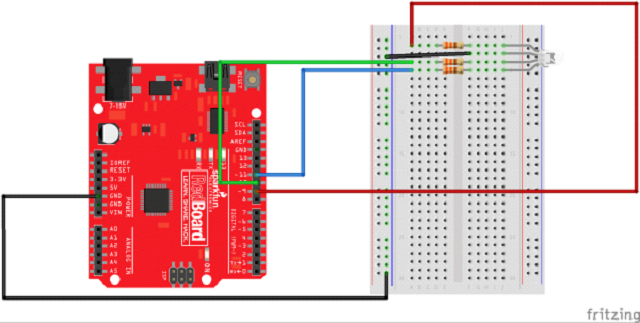
GND
What You Should See
You should see your LED turn on, but this time in new, crazy colors! If it isn’t, make sure you have assembled the circuit correctly and verified and uploaded the code to your board or see the troubleshooting section.