Week 4 – Multiple LED
Experiment 4: Driving Multiple LEDs
Name: ___________________________________________________
Introduction
Now that you’ve gotten your LED to blink on and off, it’s time to up the stakes a little bit – by connecting eight LEDs at once. We’ll also give your RedBoard or Arduino a little test by creating various lighting sequences. This circuit is a great setup to start practicing writing your own programs and getting a feel for the way Arduino works.
Along with controlling the LEDs, you’ll learn about a couple programming tricks that keep your code neat and tidy: for() loops – used when you want to run a piece of code several times
Parts Needed
You will need the following parts:
1x Breadboard
1x RedBoard or Arduino Uno
8x LEDs
8x 330Ω Resistors
9x Jumper Wires
Hardware Hookup
Ready to start hooking everything up?
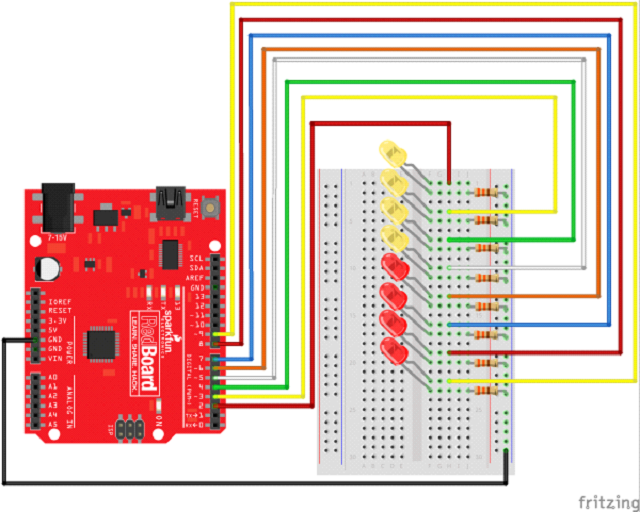
Check out the Fritzing diagram and hookup table below, to see how everything is connected.

What You Should See
This is similar to circuit number one, but instead of one LED, you should see all the LEDs blink. If they aren’t, make sure you have assembled the circuit correctly and verified and uploaded the code to your board, or see the troubleshooting section.
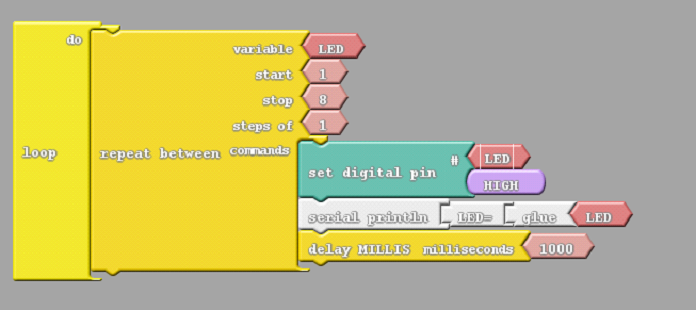
Program
Turn on the LED connected from pin 1 to 8 with an interval of 1 second. [ Note: If you connected the LED’s from pin 2 to 9, the start value will be 2 and stop value would be 9]
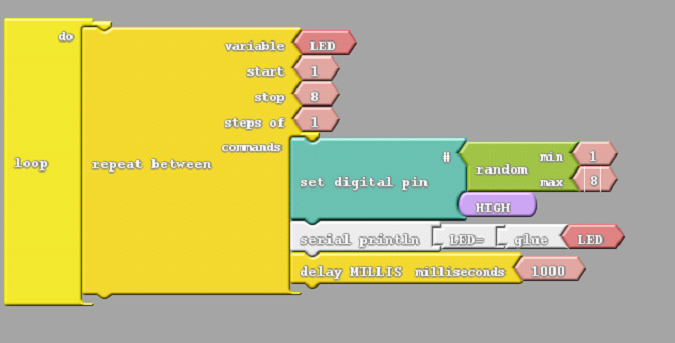
Turn on a random LED connected between 1 to 8.
Challenges
⦁ Turn ON the LED’s in sequesce from 1 to 8 with an interval of 500ms.
⦁ Turn on the LED’s in sequence from 1 to 8 with an interval of 250 ms and turn off the LED’s from 8 to 1 with an interval of 100ms.
Real World Application
Scrolling marquee displays are generally used to spread short segments of important information. They are built out of many LEDs.