Using a Water Sensor
With knowledge of what a water sensor is and how it works we can now make a device that changes an LED when water meets the sensor.
Key Objectives:
In this project, you will:
•Create a circuit that functions with a water sensor
•Document how the circuit reacts to water touching the water sensor
1.Explore phase
Someone needs a circuit that has a water sensor inside it
2. Create phase
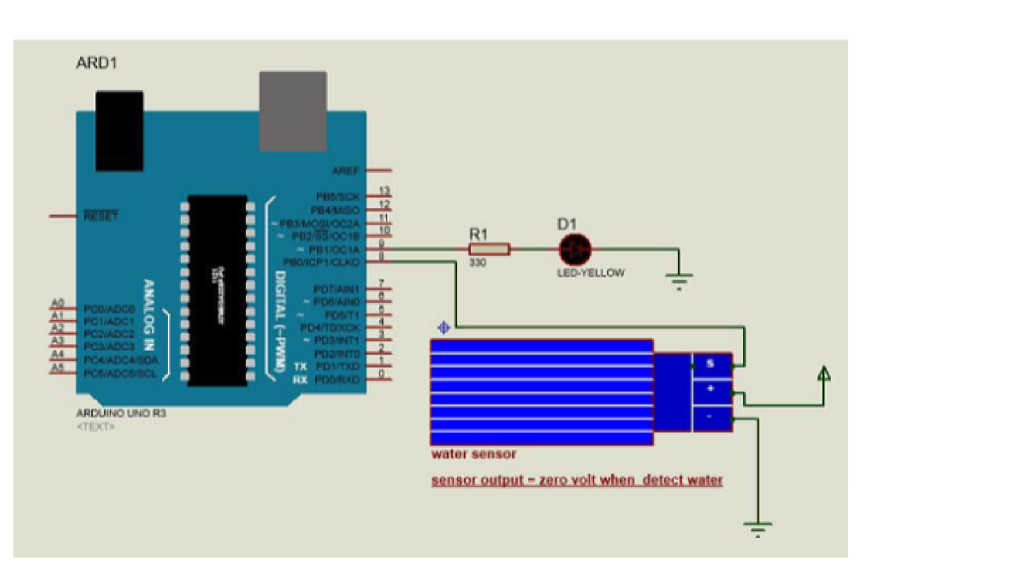
Using a Breadboard, Arduino, Water Sensor, LED and 330 ohm resistor, Create the following circuit
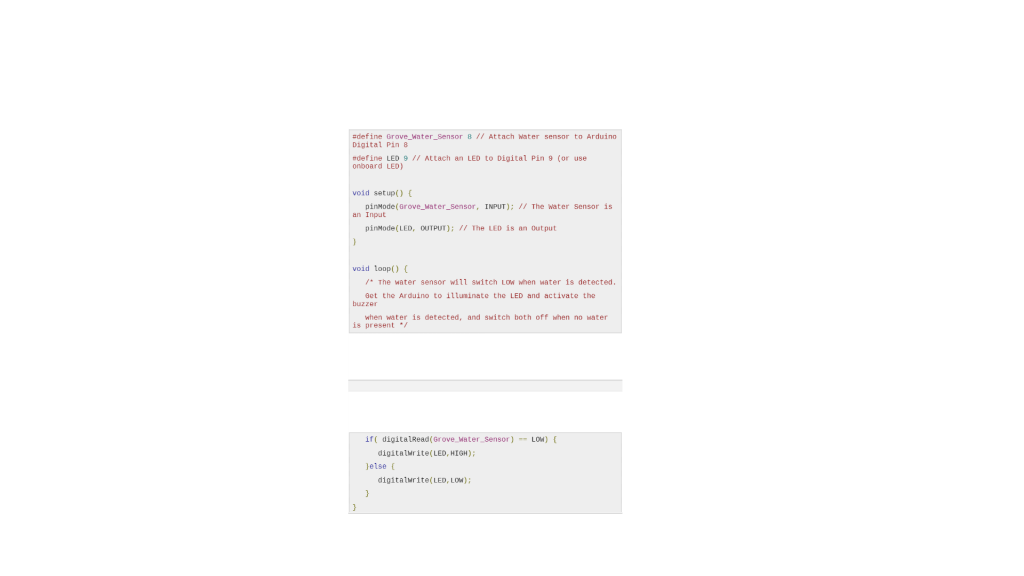
Once the circuit is made create the code to go with it
Extra notes for creating the circuit:
Water sensor has three terminals – S, Vout++, and GND −−.
Connect the sensor as follows −Connect the +Vs to +5v on your Arduino board.Connect S to digital pin number 8 on Arduino board.Connect GND with GND on Arduino.Connect LED to digital pin number 9 in Arduino board.
When the sensor detects water, pin 8 on Arduino becomes LOW and then the LED on Arduino is turned ON
3. Share phase
Document how the sensor reacts when it comes into contact with water.